Address book
- 07 Mar 2023
- Print
- DarkLight
- Download PDF
Address book
- Updated on 07 Mar 2023
- Print
- DarkLight
- Download PDF
Article summary
Did you find this summary helpful?
Thank you for your feedback!
Create your address book
Interests :
Missions: select your customers, suppliers, sites, delivery or pick-up points by their name and addresses and their geolocation will be selected automatically.
Trip / activity reports: addresses will be replaced by the name entered in the address book. The addresses entered in the address book can also be used to filter the activity reports based on certain addresses only.
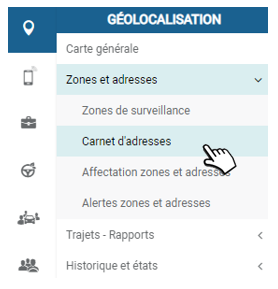
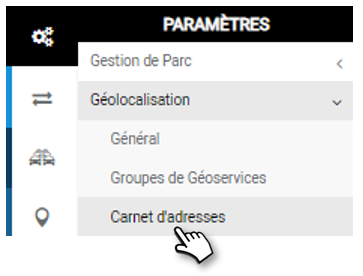
How to create/enrich your address book?
There are two ways to create a card in the notebook:
1. Import an address file in Excel format (.csv)
2. Enter the addresses manually.
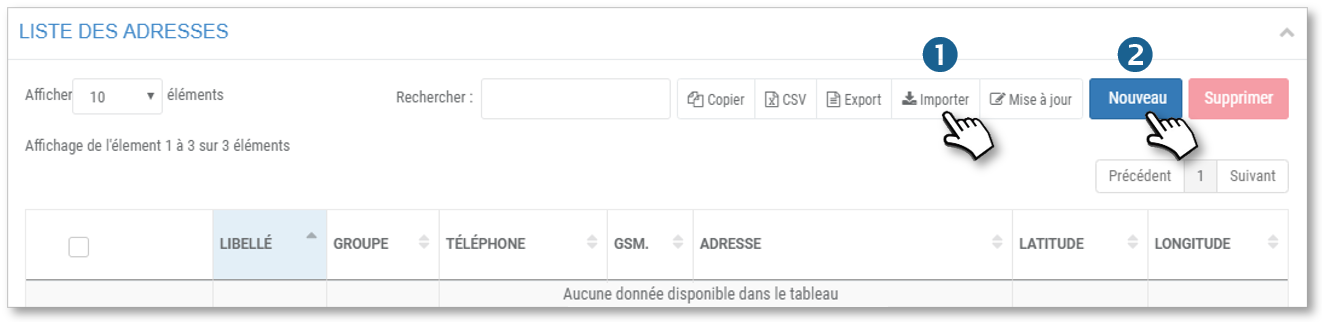
Import an addresses file
Import your addresses directly into the application using the proposed file template.
The number of addresses is limited to 500 per import
Please import multiple files for quantities > 500
Procedure:

1. Download the file template by clicking on  and follow the instructions for entering addresses:
- Enter the data per column in the file.
- Keep the postal code field in numeric form. The city field should not contain commas.
- Save the file as 'CSV UTF-8 (comma delimited)(*.csv)' on your computer.
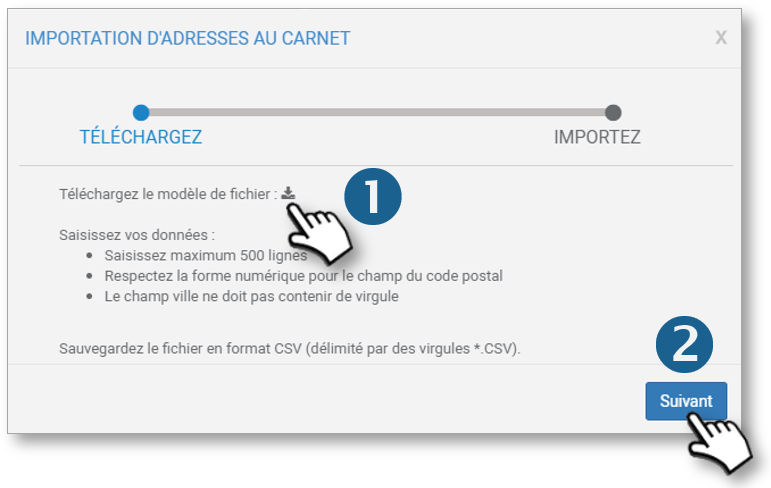
2. Click on NEXT.
3. Click the "Choose a file" button, and then select and open the file you just SAVED.
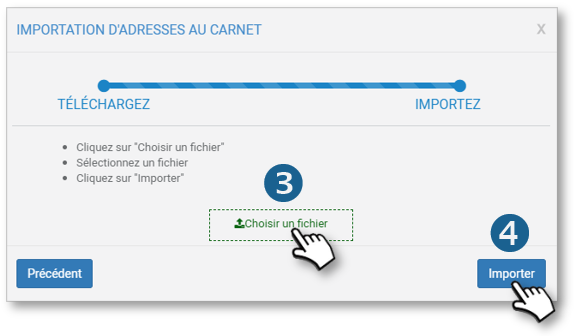
4. Click on the "Import" button.
After a few minutes (depending on the amount of addresses), the system will have geocoded the addresses, and the corresponding latitudes/longitudes will be automatically stored.
The addresses are now displayed on the screen.
Existing addresses in the application (identical lat/long) will not be taken into account.
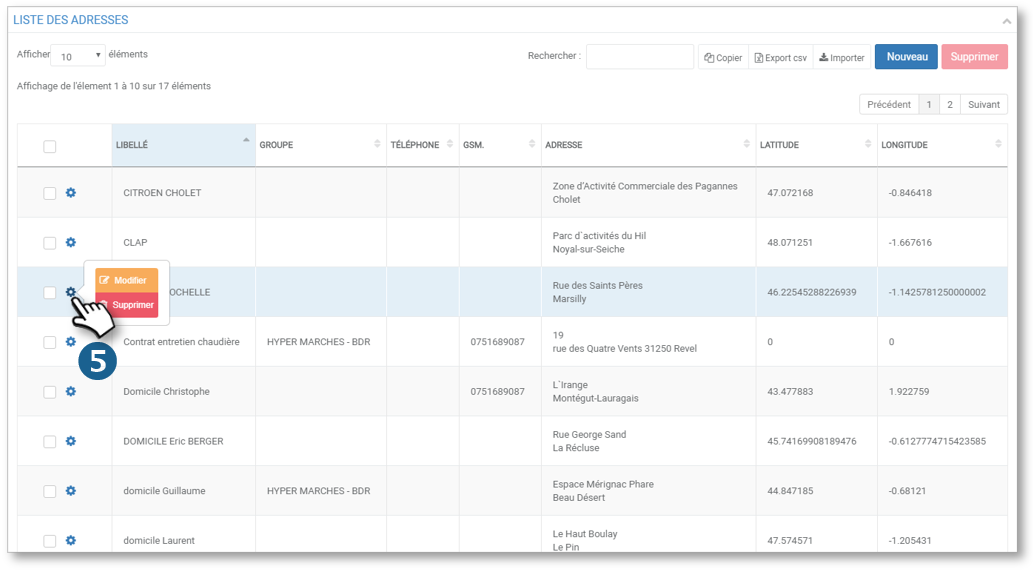
5. By clicking on  you can CHANGE or DELETE each address.
You can export your address list, in .csv format, by clicking on this button :

Legend of the columns of the file :
- lib_adresse : name of the client or site listed
- Adresse : geographical address
- code_postal : no spaces, no dashes, numeric only
- ville_adresse : city in words
- Tel : possibly a landline telephone number
- Gsm : possibly a cell phone number
- Groupe : address group: important for the distribution of supervisor access rights
- dist_detect : set by default to 100 meters. Accepts the following values (10, 20, 30 ....750). Do not add units, meters will be taken into account.
- Latitude/Longitude : optional, if you know them.
The geographical addresses must be correct: no CEDEX, respect of the separate columns: Address - Postal code - City
If the address is not known, (new activity zone, new residence, new subdivision...) You can locate the place by clicking on the map, then associate a label and SAVE
Enter an address manually
You have two options:
- Click on the general map
From the general map: in the tool bar, click on  then :
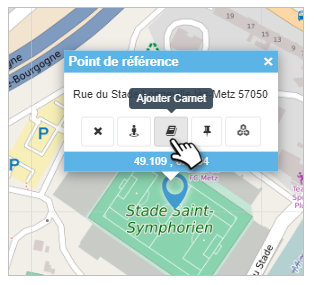 .
.
The input window appears:
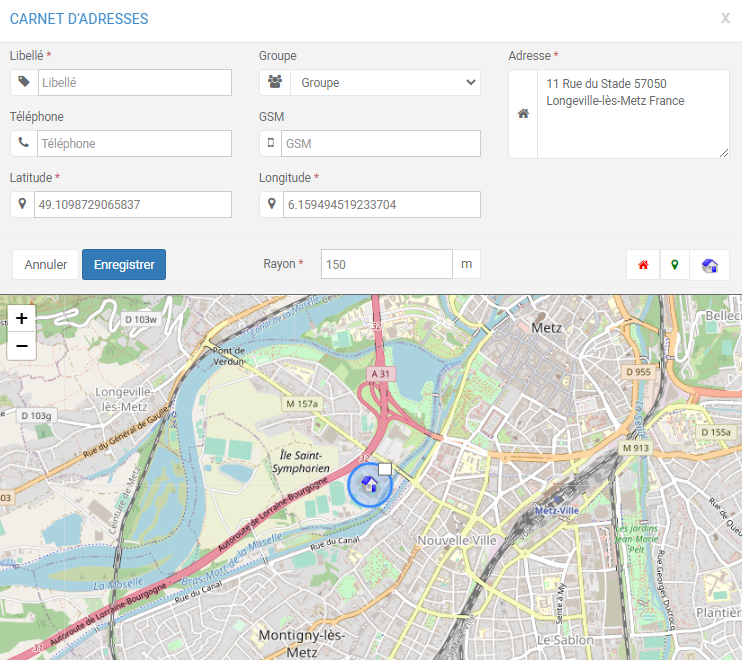
- Entering the address from the NEW button
Click on the NEW button

The input window appears:
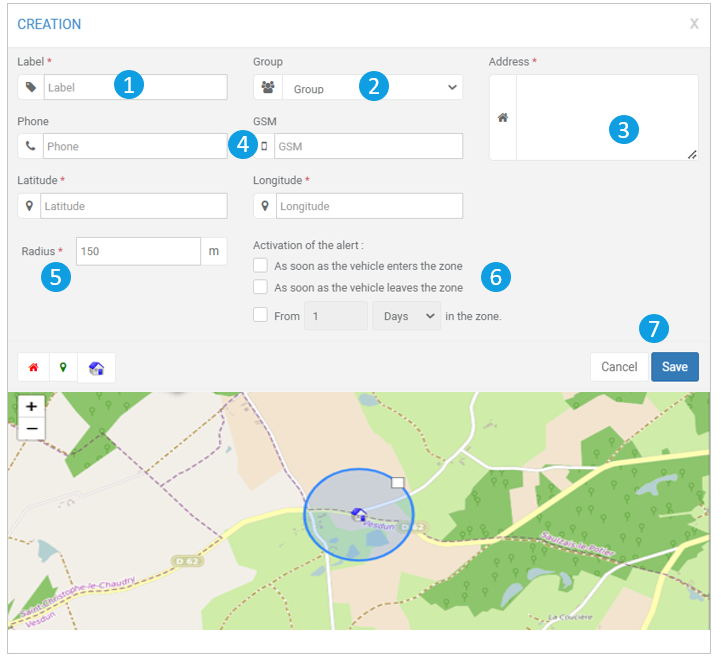
1. Enter a label for this address.
2. Select an Address Group to belong to
3. Enter the address or click on the map (if you have clicked on NEW, otherwise the address is already filled in). (The map is centered on the center of France by default)
4. Enter the phone numbers for this address (this will facilitate the exploitation later).
5. Modify the detection radius for this address (a vehicle parked in this radius will be attached to this address of departure and/or arrival of a trip).
6. Check the alerts you want to trigger: zone entry or exit alert, presence in the zone for x amount of time alert (see Monitoring Areas section)
7. SAVE this address. (CANCEL to clear the form)
8. The address is added to the list:

Edit an address
.gif)
Delete one or more addresses
.gif)
Setting up address groups
Create a group
This feature allows you to create GROUPS of addresses, NOT the ADDRESSES themselves!
To create the addresses, open the menu File/Data > Address Book (explanations above )
Create as many groups as you want:
1. Place your cursor over any group and click NEW to create a group.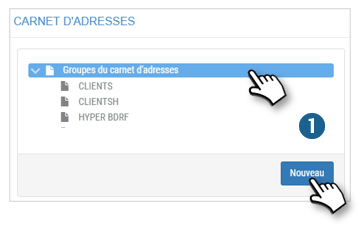
2. Enter a name for this group.
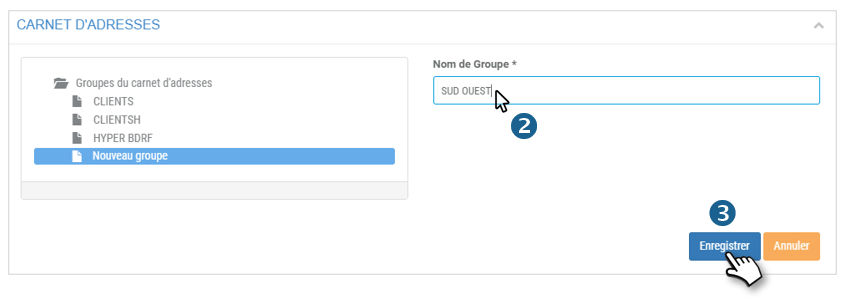
3. Don't forget to SAVE.
Delete a group :
1. Select the concerned group
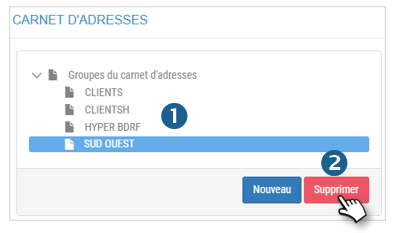
2. Click on DELETE.
Add and delete addresses in each group
Add one or more addresses in a group :
1. Select the relevant group (highlighted)
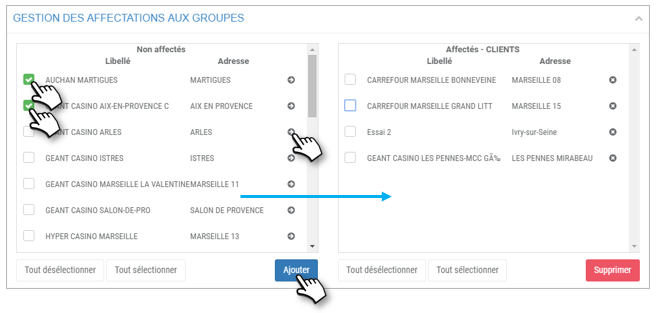
2. In the left column (Unassigned): check the boxes of the concerned addresses and click on the 'ADD' button or click on the black arrows of the concerned addresses.
3. The addresses will move from the left column to the right column in the concerned group.
No need to validate or SAVE, the action is immediate.
Remove address(es) from a group :
1. Select the relevant group (highlighted)
2. In the right column (concerned group): check the boxes of the concerned addresses and click on the button 'DELETE' or click on the black crosses of the concerned addresses.
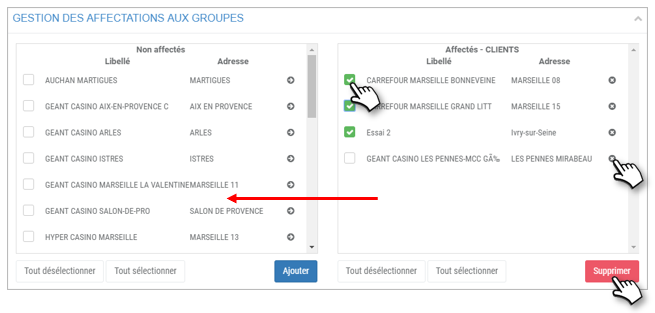
3. The addresses will move from the right column to the left column (Unassigned).
4. No need to validate or SAVE, the action is immediate.
The addresses are not actually deleted, they are switched to the general list of addresses without an assignment group.
Was this article helpful?