Assignment tour
- 11 Oct 2021
- Print
- DarkLight
- Download PDF
Assignment tour
- Updated on 11 Oct 2021
- Print
- DarkLight
- Download PDF
Article summary
Did you find this summary helpful?
Thank you for your feedback!
The platform allows you to automatically create routes from the selected missions. The goal here is to optimize the routes according to the schedules and destinations either in a simple way so that the missions follow each other perfectly in terms of schedules or in the form of a loop so that the employee follows a route that will bring him back to his starting point.
Warning
Before creating a tour, you must first create mission types
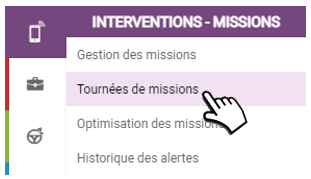
Creation of a tour
1. Click on the "new tour" button. A new window will open:
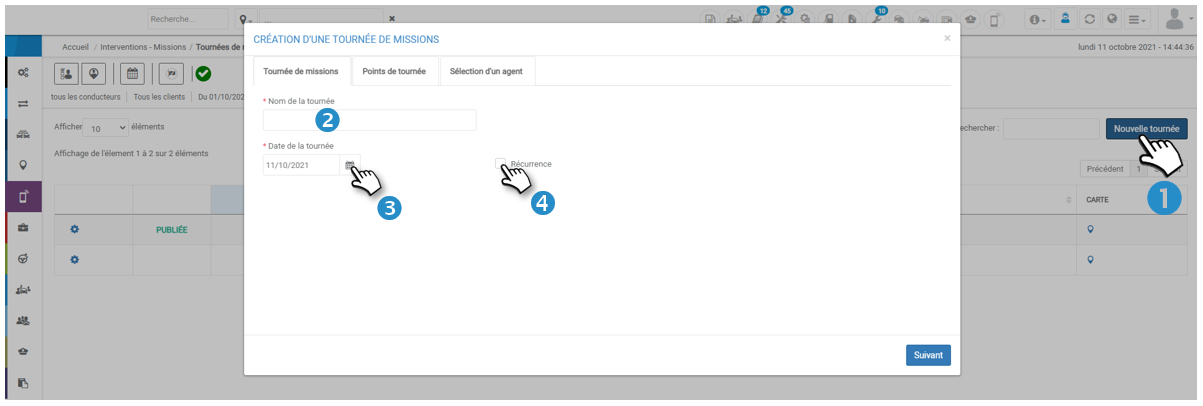
2. Enter the name for this tour
3. Enter the date of the tour
4. Click if you wish to apply a recurrence to this tour, if so, the days of the week become selectable and an end date is requested: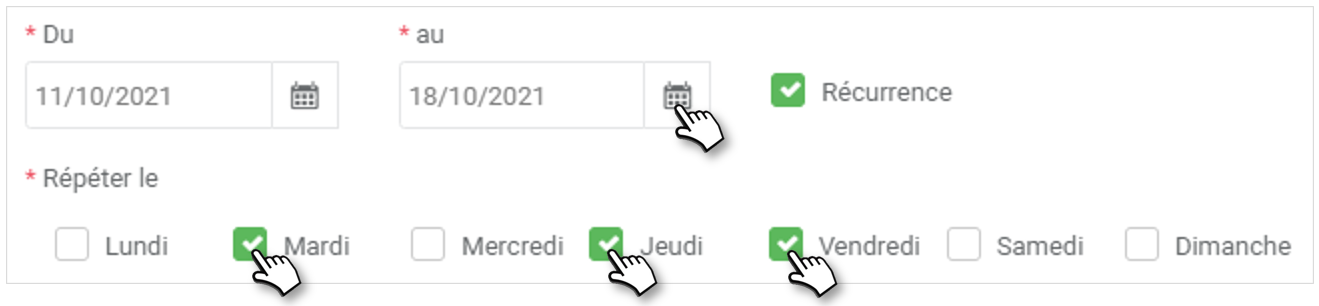
5. Click on next
Definition of tour points
1. To add jobs to the tour, enter the start time, client and job type.
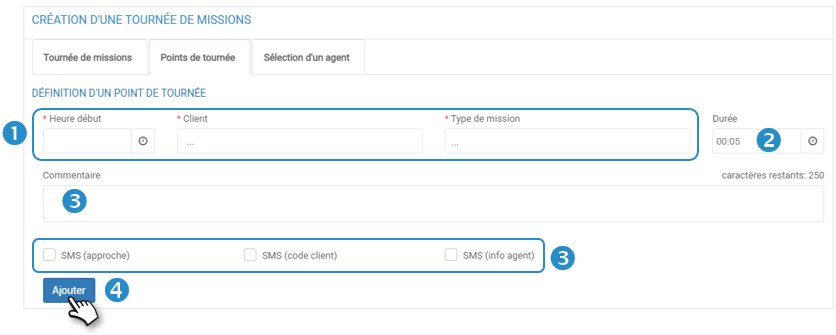
2. The duration of the mission is automatically displayed according to the type of mission selected but can be modified.
3. If necessary, add a comment and SMS alerts.
4. Click on add to insert a mission to the tour and repeat as many times as the number of tour points planned.
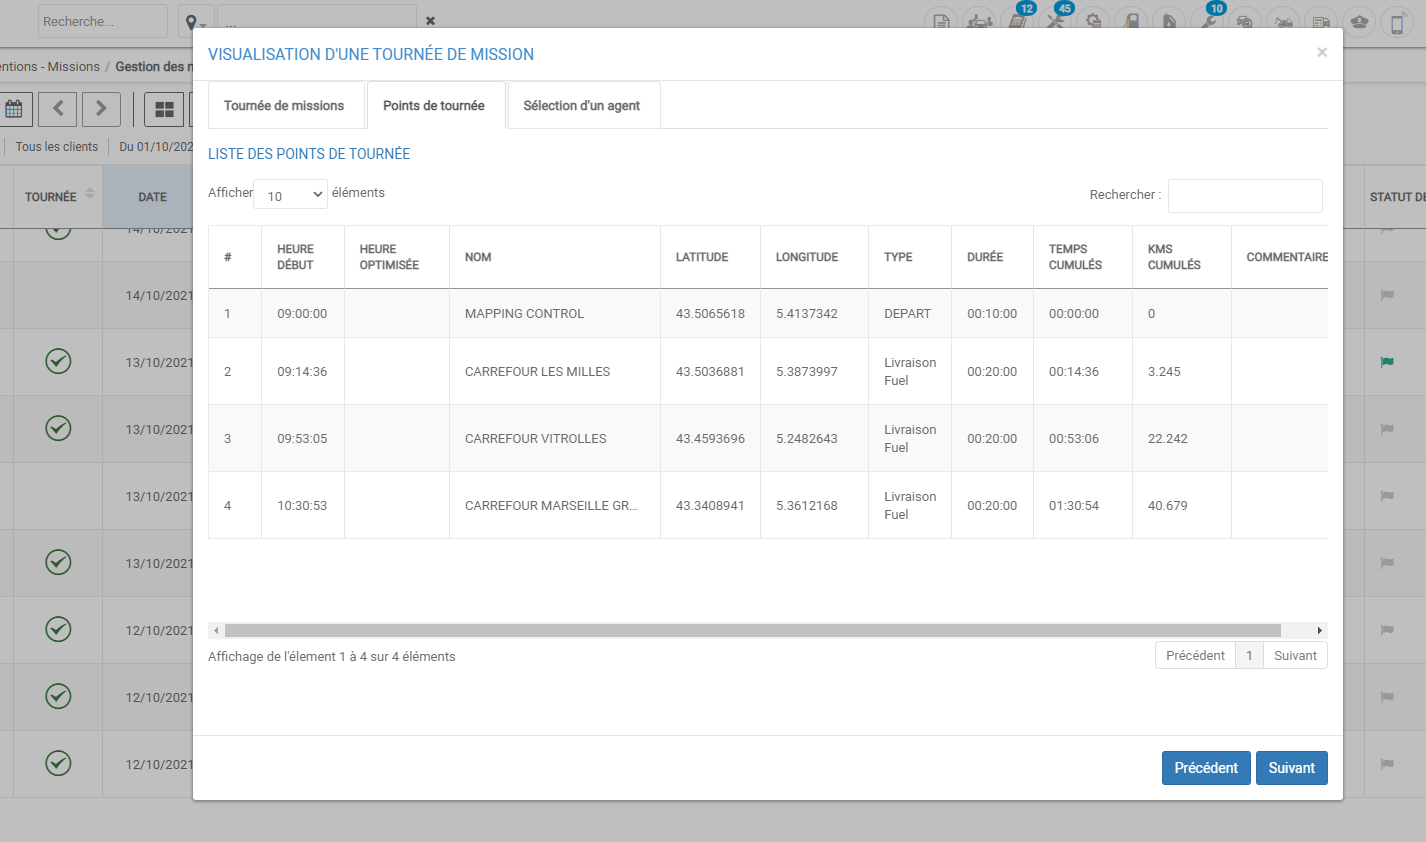
List of tour points
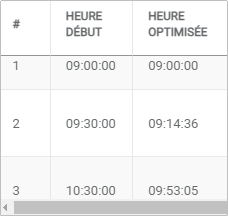
The list of tour points (missions) is fed into the table classified according to the manually entered start times. The column "optimized time" remains empty until the selection between "simple optimization" and "loop optimization":
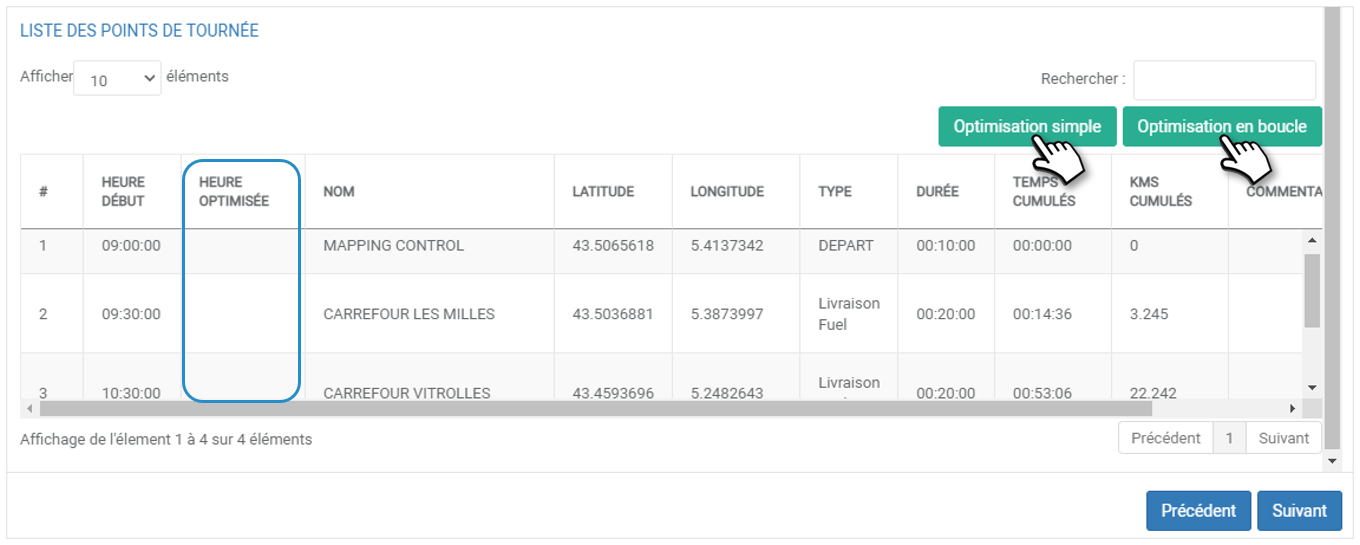
When selecting one of the two optimizations, the empty column is filled with the optimized mission schedules.
Warning
Clicking on the tour optimization will change all the departure times of the missions.
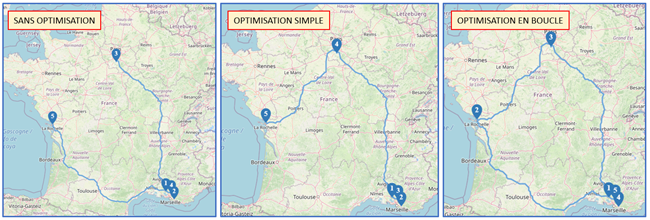
Example of the same tour with and without optimization:
Selecting an agent
The selection of the agent is not mandatory to SAVE the tour but it will be mandatory to publish it.
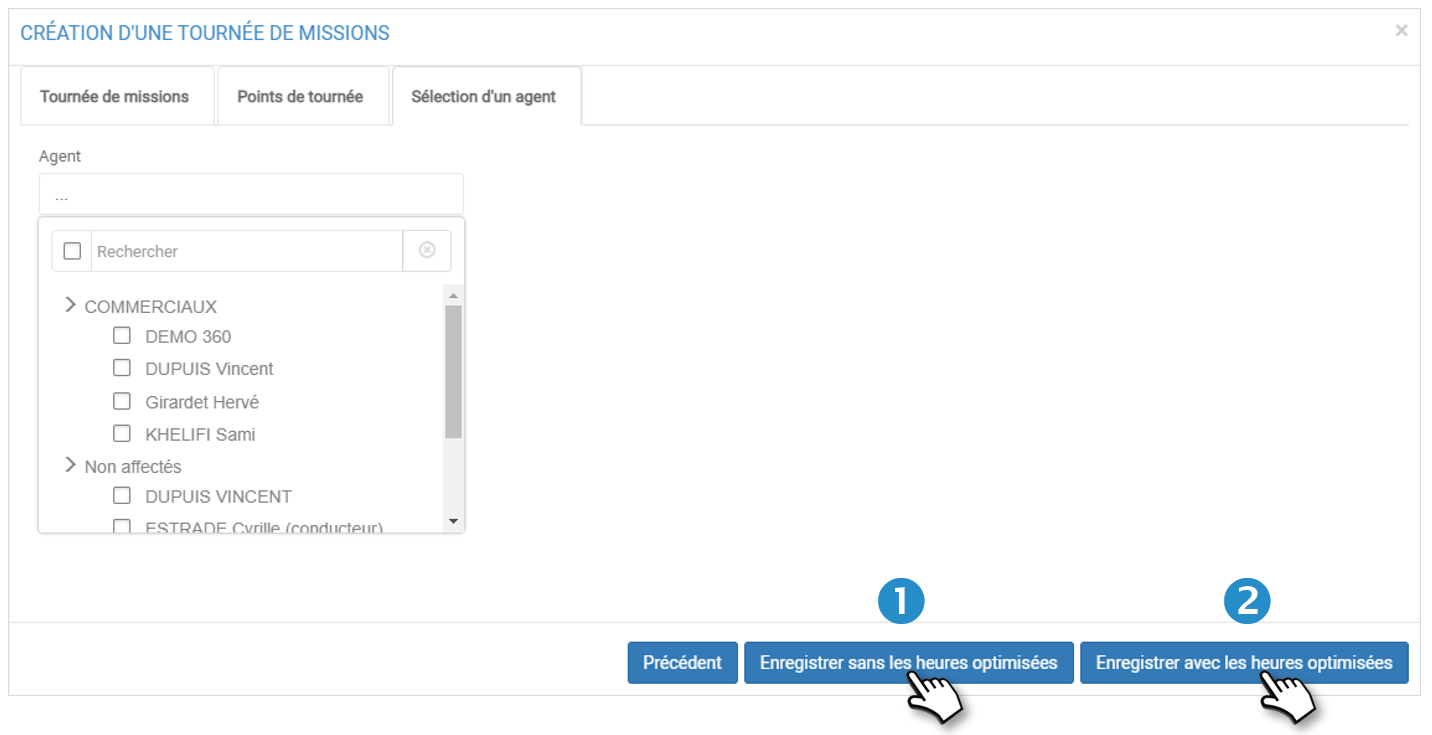
The tour can still be SAVED by keeping the hours entered manually (1) or by taking into account the previously optimized hours (2).
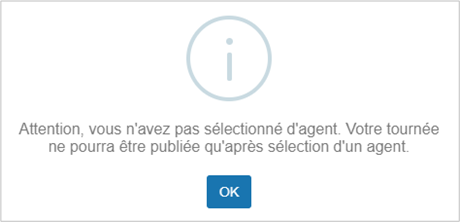
If no agent is selected, a message appears indicating that the publication (making the tour visible to an agent) can only be done after the selection of an agent (via the modification).
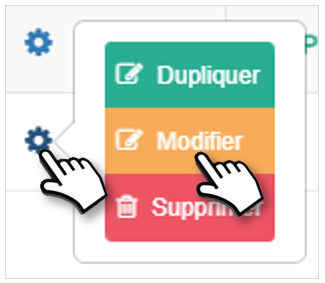
To add an agent after the fact, click on the pictogram  and then on modify :
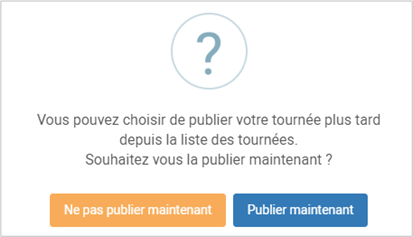
Select an agent in the corresponding tab and SAVE. A new window appears offering you to publish now or not to publish now.
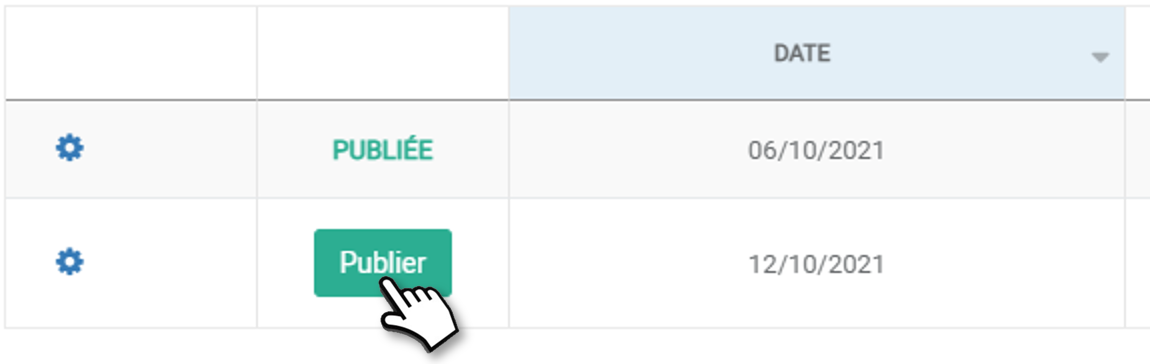
By clicking on publish now, a "published" label is displayed in the table:
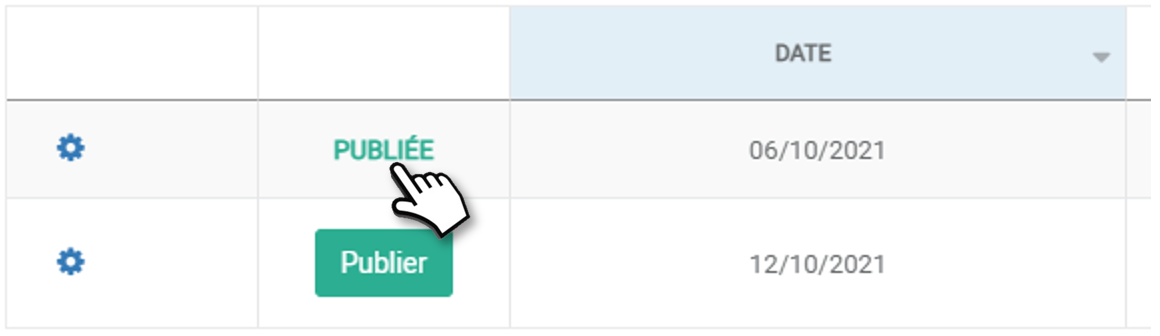
By clicking on "don't publish now", a publish button will appear in the table, allowing you to publish the tour later:
To modify, duplicate or delete a tour, click on the pictogram and then on the desired item:
Warning!
Modification and deletion are no longer possible once a tour mission has started.
Identification of tour missions
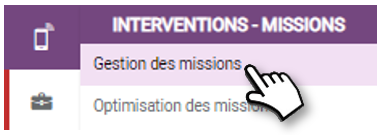
After publication, all missions belonging to tours are identified by a pictogram:
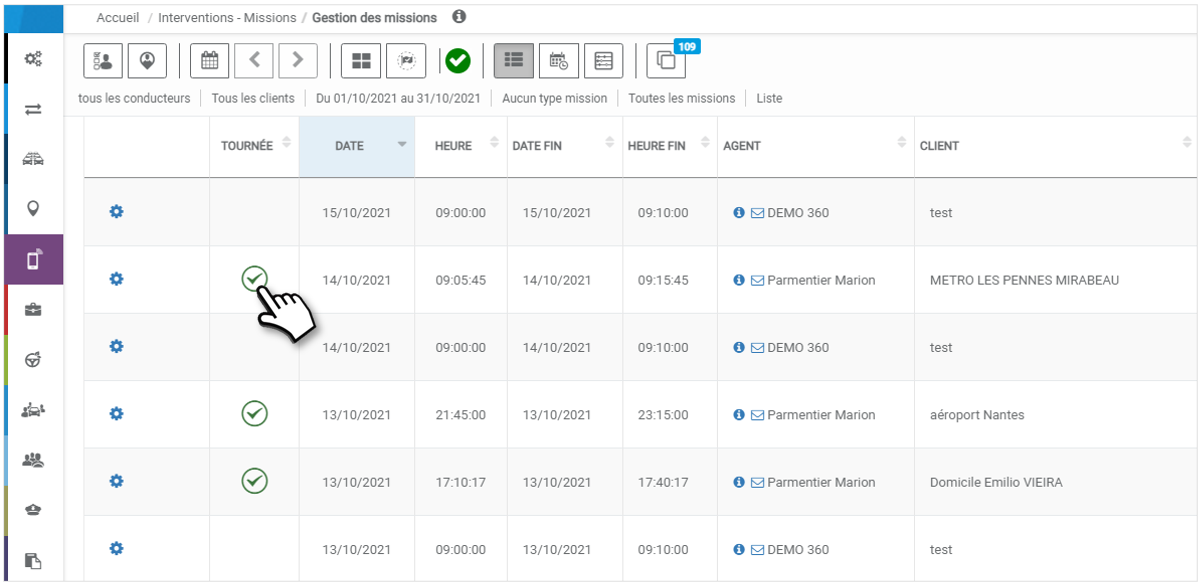
When clicking on the pictogram, a window with all the details of the tour containing the mission is displayed:
Was this article helpful?