Geolocation
- 18 Feb 2025
- Print
- DarkLight
- Download PDF
Geolocation
- Updated on 18 Feb 2025
- Print
- DarkLight
- Download PDF
Article summary
Did you find this summary helpful?
Thank you for your feedback!
Map
There are 2 ways to access the geolocation map of your vehicles:
1. The "Geolocation" homepage (see Getting started section)

2. The "Map" page in the Geolocation menu.
Click on to display the menu and then on Geolocation to pull down the relevant menu:
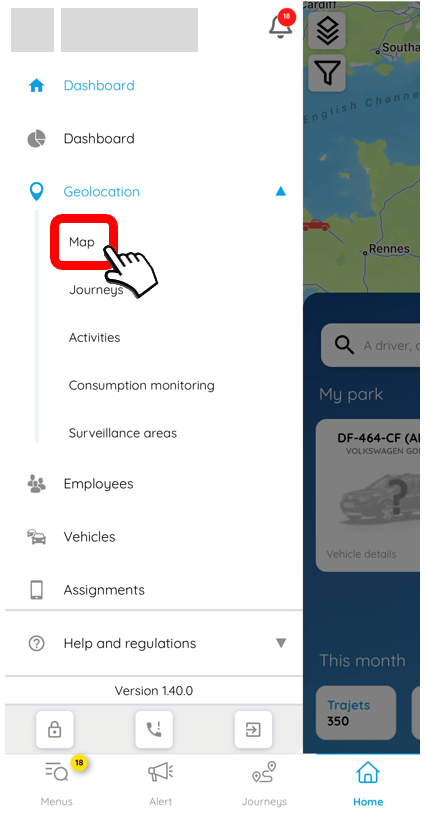
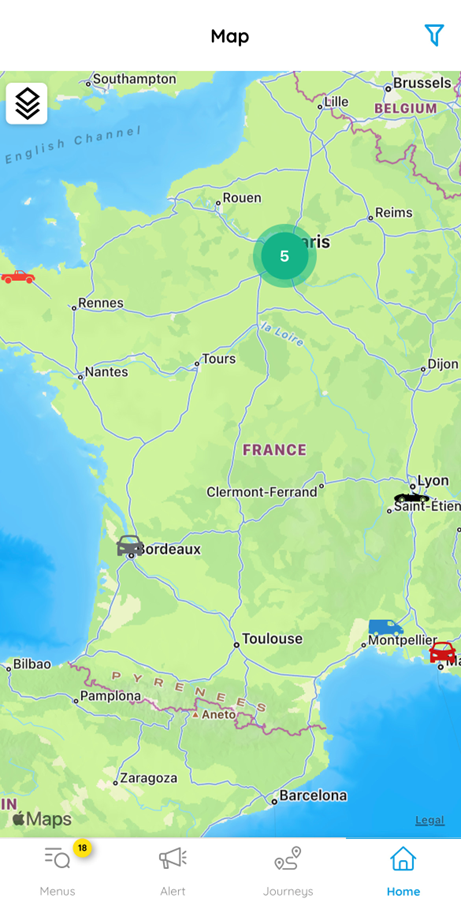
Then click on "Map" to view your vehicles, equipment or containers on the map:
Types of cards
There are different types of maps that you can select by clicking on this icon .
.
You can also display the first and last names of the drivers, their vehicle plate, or their internal ID or the vehicle registration by clicking on the sliders.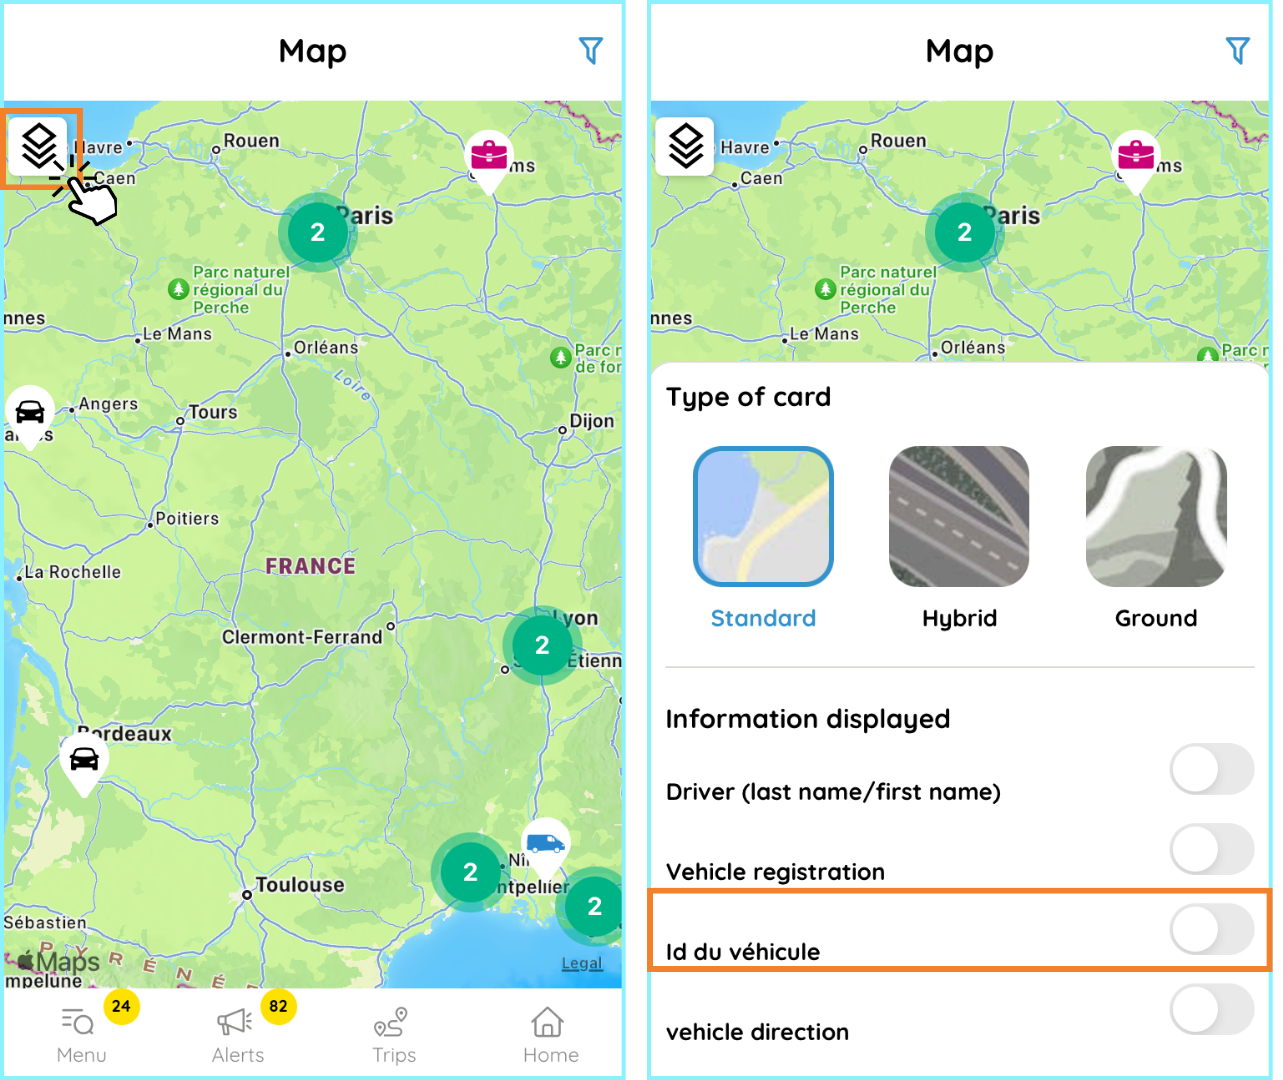
Locating a vehicle
To obtain information on a vehicle, click on the pictogram on the map, an information widget appears at the bottom of the screen:
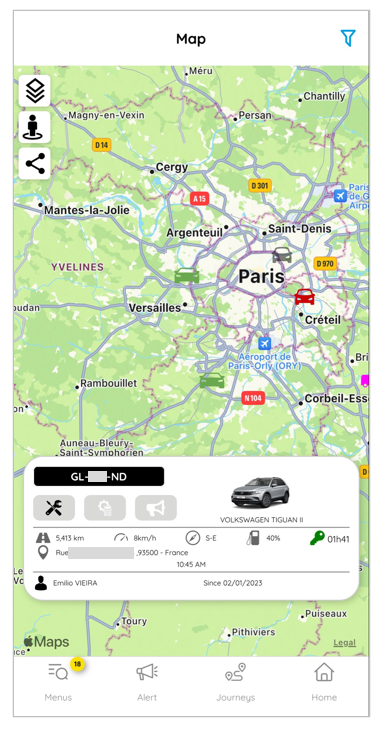
It is then possible to access the vehicle file by clicking on the widget.
Information
Supervisors only see the vehicles they supervise.
Share the position
It is possible to share the position of a vehicle from the general map. To do this, click on a vehicle and then on the share icon:

In the new window that opens, select the end date and time for sharing and click on VALIDATE:
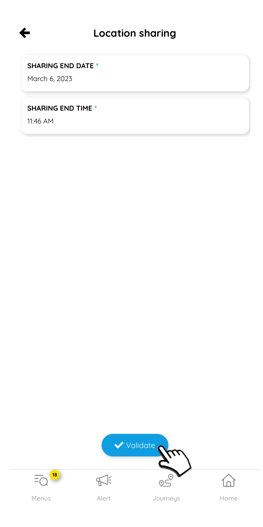
Then select the application through which you want to share the location.
Journeys
There are 2 ways to access the recorded journeys of your vehicles:
1. The shortcut "Journeys" in the shortcut bar on the homepage.
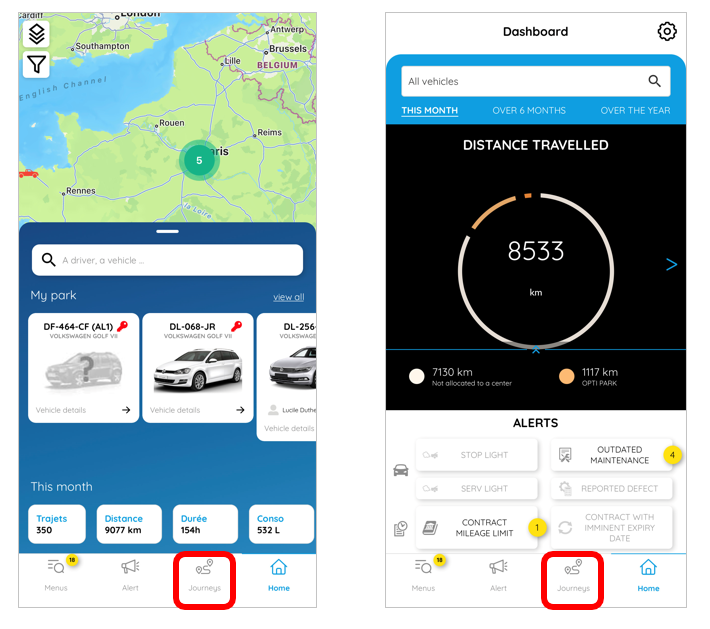
2. The "Journeys" page in the Geolocation menu.
Click on to display the menu, then on Geolocation to pull down the relevant menu, then select "Journeys" or "My journeys" for for users without Geolocation.

(+screen)
3. From the vehicle file.
There are 2 ways to access the trips from the vehicle file:
- From the general map, select a vehicle to access the vehicle record, then click on "View journeys"
(+screen)
- From the menu, select Global Fleet and then select "View Trips" for the desired vehicle.
(+screen)
Journeys in progress
When you consult the list of trips for a vehicle (List of vehicles > Trips > See all), you can easily distinguish the current trip thanks to a red “LIVE” dot.
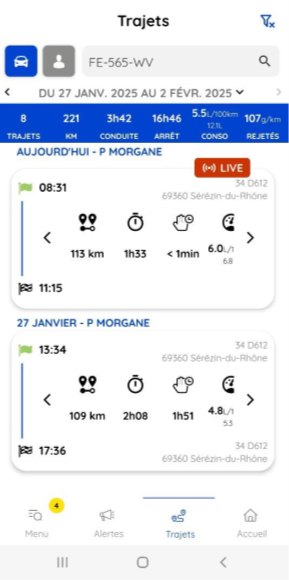
The routes are listed from the most recent to the oldest in order to provide you with better visibility.
Special case
If a current route is not displayed correctly, make sure that the vehicle's connection is active and that the GPS data is synchronized.
History of journeys
From this window, consult the trip history by driver or by vehicle.
To view the trip history, you can choose between driver and vehicle.

After selecting the type, click on the search bar. A drop-down list of all your drivers or vehicles appears.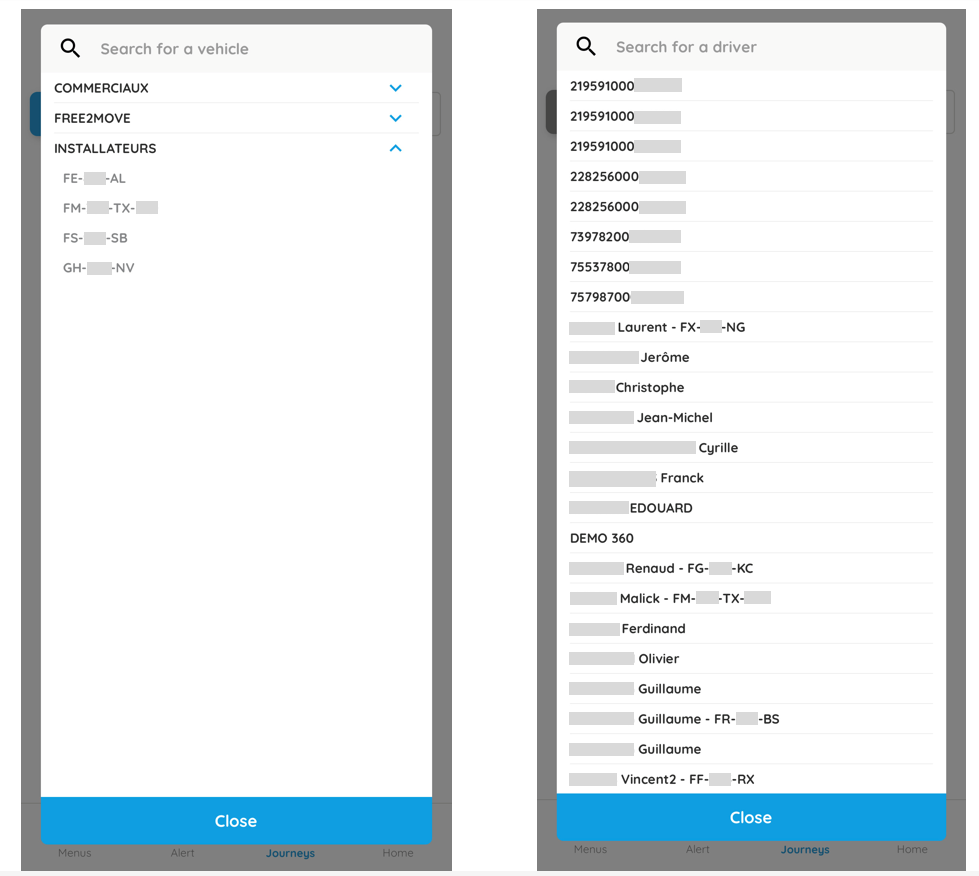
Scroll down or enter the search in the top field and select.
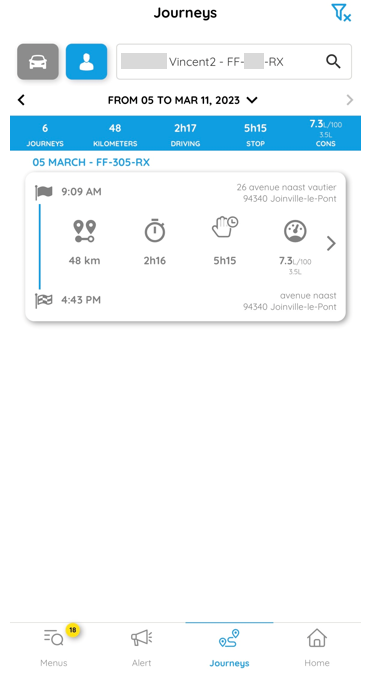
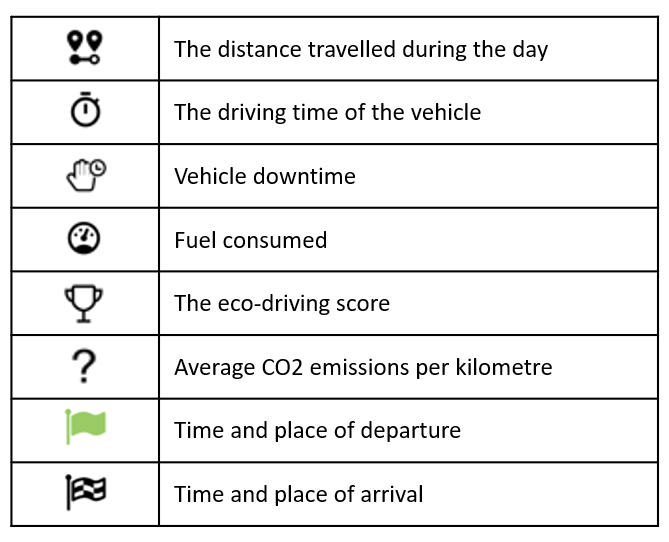
You access the list of trips made during the week displayed by default. In addition to the departure and arrival times and locations, you can view the other vehicle data as listed below:
Information
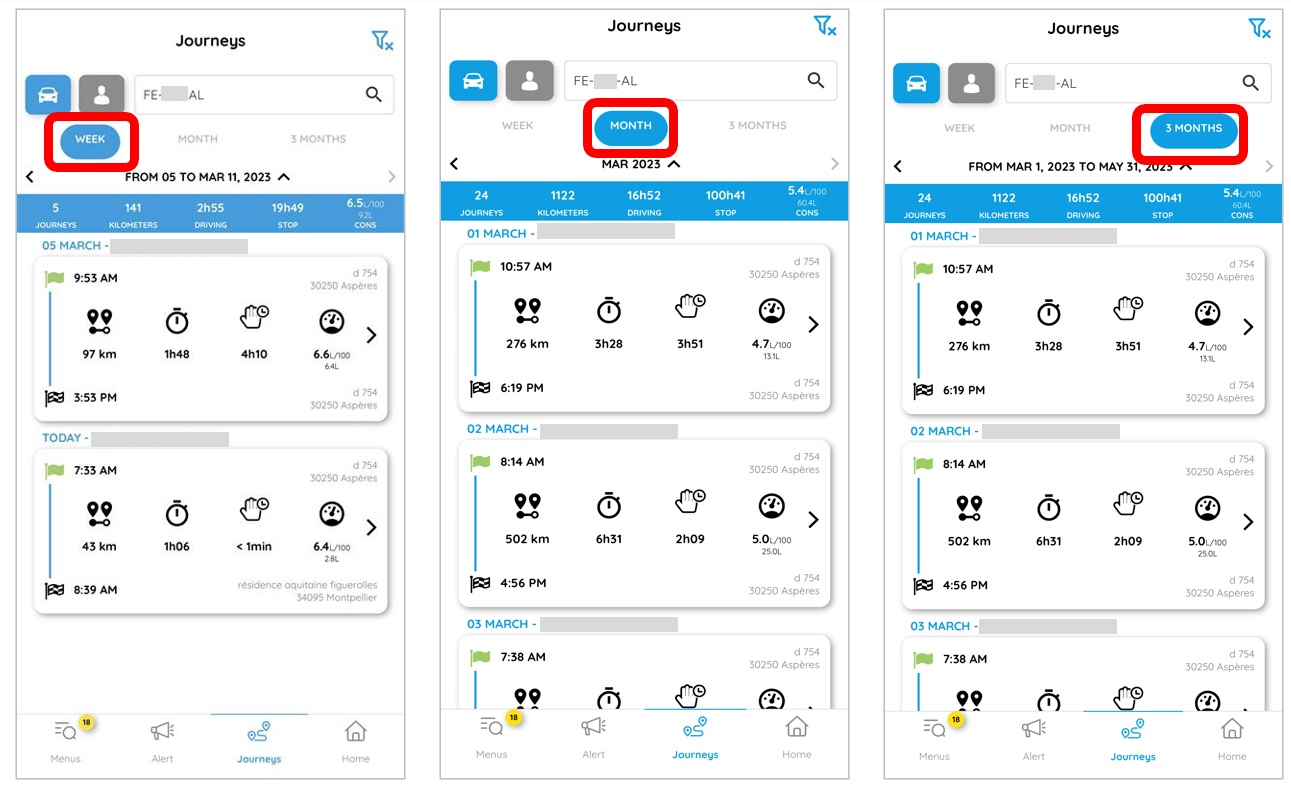
You can click on the date to navigate between a "week", "month" or "3 month" display
You can click on the date to navigate between a "week", "month" or "3 month" display
After selecting the desired driver or vehicle, the list of trips made during the week is displayed by default. Click on the date to navigate between a "week", "month" or "3 month" display.
Then, it is possible to access the details of the journeys of a particular day by clicking on the block of this one, you arrive then on this page:

Other features
On this page, there are several options for viewing the progress of the journey.
1. Review the journey in full screen mode.
Click on the icon 

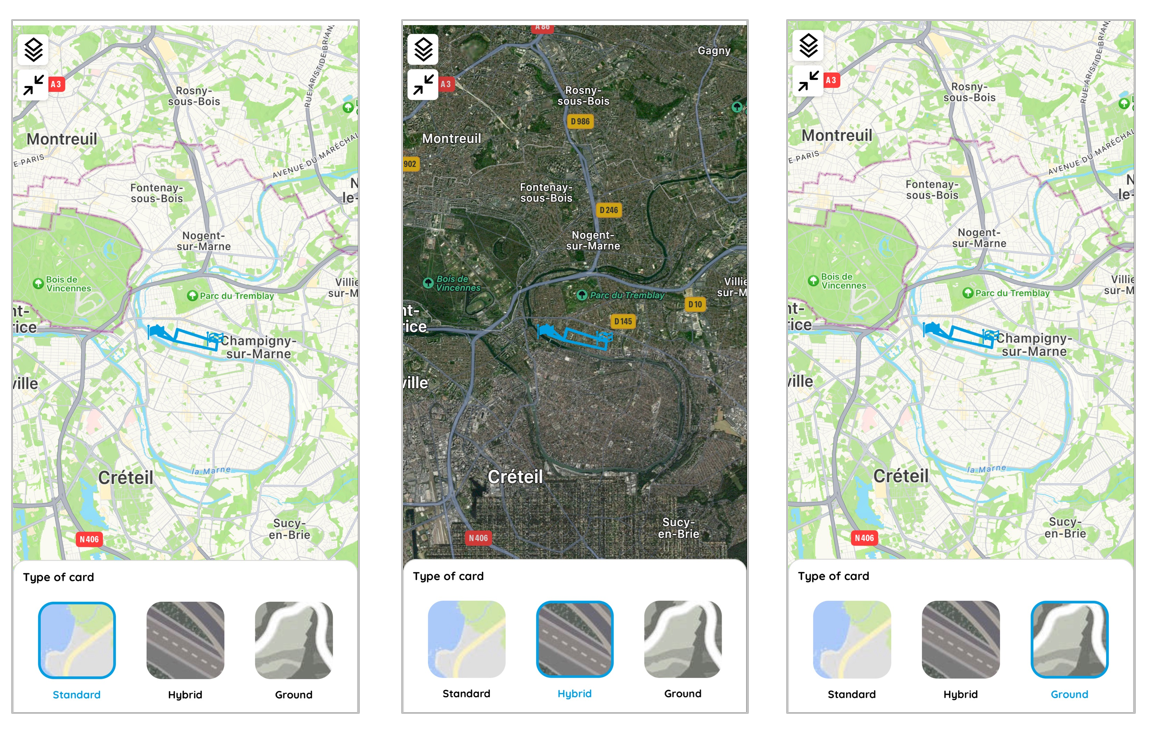
2. See different types of cards.
Click on the icon and select the type of map you wish to view.
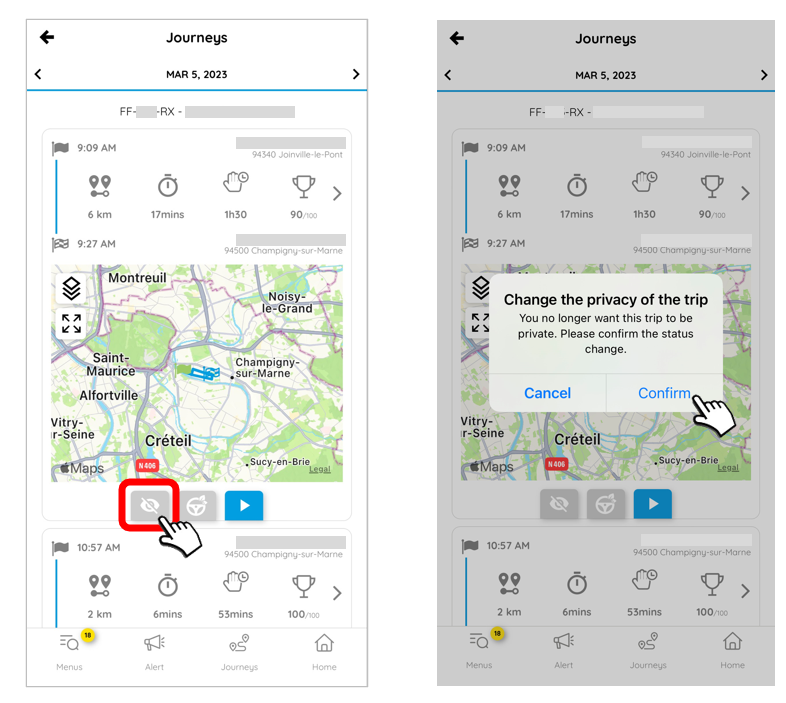
3. Switch the route to "private" status:
This feature allows the user to make a journey private, which will not be visible to other users. This option can be useful if the user wishes to keep their journeys private.
Click on the icon , then click Confirm to set the trip to private status.
4. See eco-driving events: This feature allows the user to visualise different eco-driving events during the journey, such as hard braking, fast acceleration and sharp turns etc. This data can help the user to improve their driving and adopt more eco-friendly behaviour. This data can help the user to improve their driving and adopt a more ecological behaviour.
Click on the icon
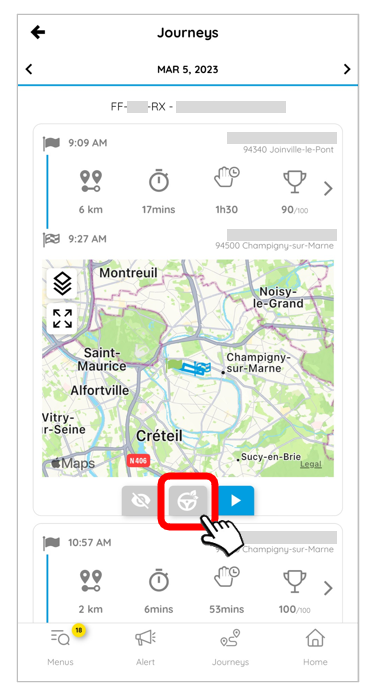
The events are shown on the route map as orange pictograms.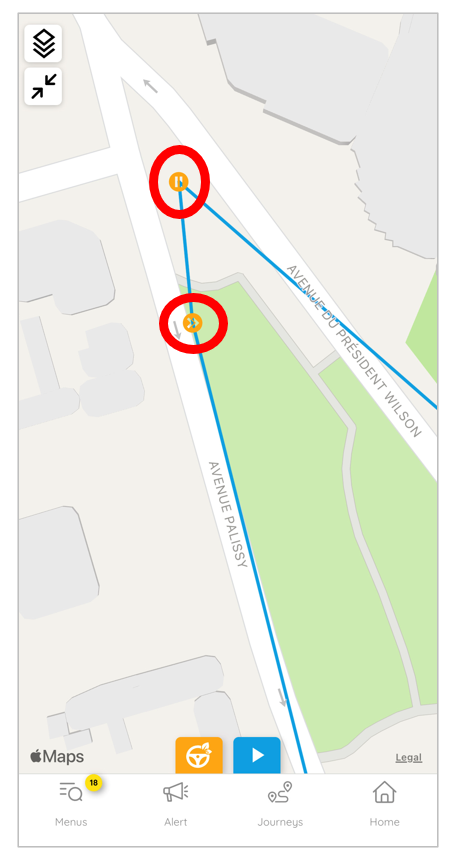
5. Start the kinematics of the route on the map:
This feature allows the user to visualise the journey on a map, with the different events during the journey. The kinematics allow the user to relive the journey virtually and can be useful for planning future routes or sharing the journey with other users.
Click on the icon to start the kinematics of the route on the map.
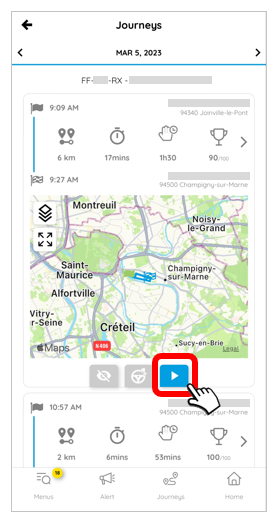
Consumption monitoring
Click on to display the menu and then on Geolocation to pull down the relevant menu, choose Consumption monitoring.
Click in the search box at the top of the screen to display the list of vehicles, then select one to access the data.
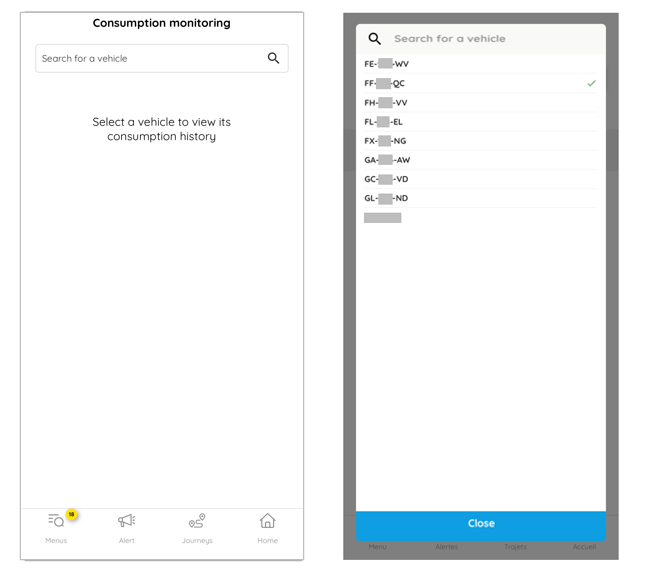
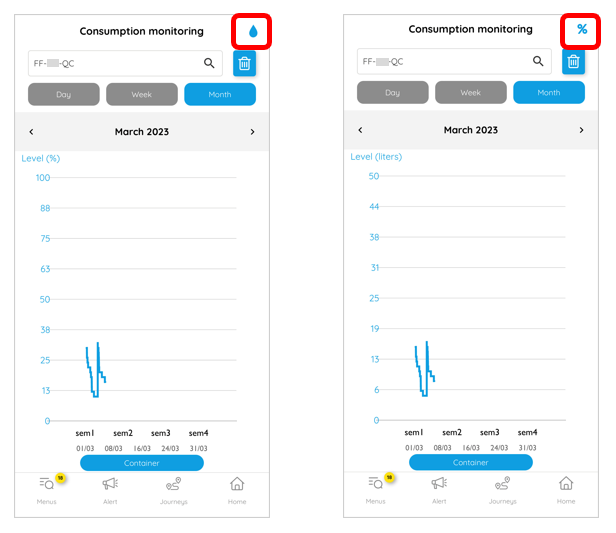
From this window, follow the consumption of your vehicles over a day, a week or a month.
To switch between litres and percentages, click on the pictogram at the top right of the screen.
Surveillance areas
Display surveillance areas
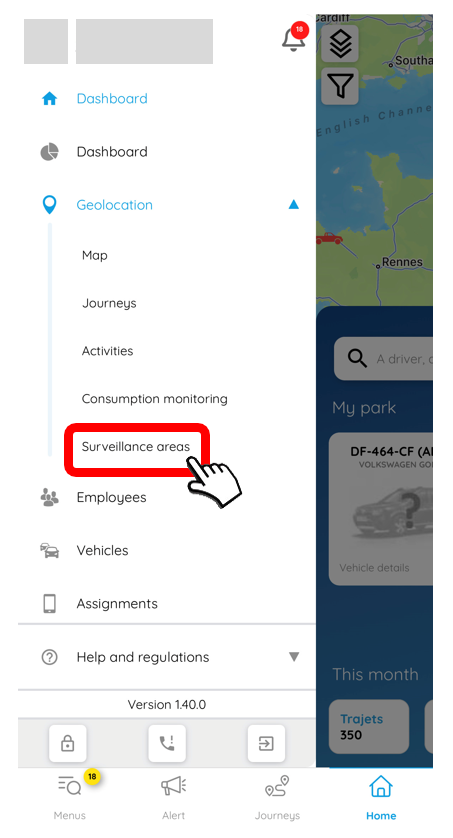
If you have already created surveillance zones, these will be displayed on the map.
To see the details of a zone, simply enter the name in the search bar at the top of the screen and select the zone concerned.

By clicking on an area, you can edit or delete it if you wish.

Do not forget to click on VALIDATE to save the changes.
Creation of a new surveillance area
Click on to create a new area.
1. Enter the name of the area.
2. Choose the affected vehicle(s).
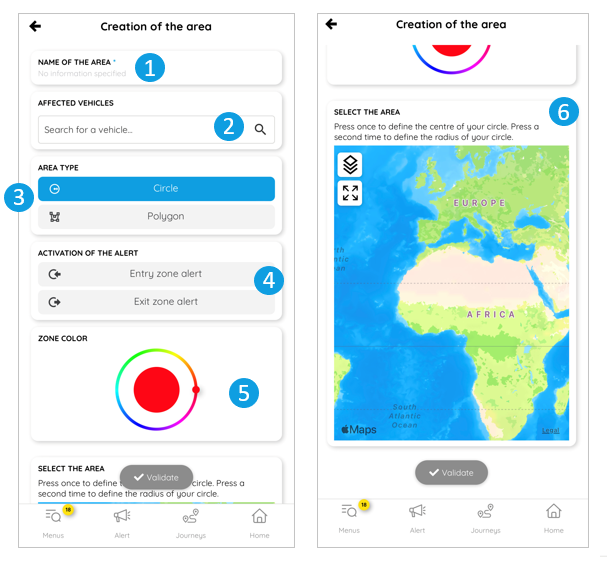
3. Click on the shape of the area you wish to draw:
 : polygon (unlimited): on the map, draw the outline of the area by clicking to drop a point.
 : circle: click on the map once to define the centre of your circle, then again to define the radius of your circle.
4. By default the alert is in Zone Entry and Exit. Click on a type to activate (activated alert turns blue)
5. Select a colour for the area.
6. Draw the area manually on the map.

7. Do not forget to save by clicking on VALIDATE.
Clarification:
The assignment of surveillance areas to vehicles (and vice versa) is done on the web platform.
Was this article helpful?