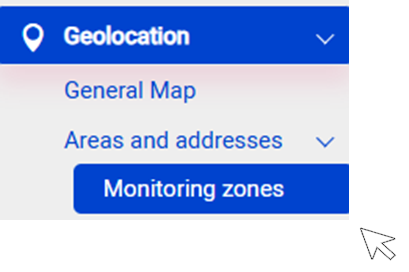
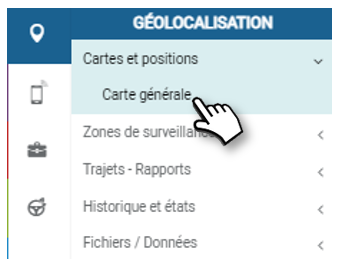
Monitoring areas
- 03 Feb 2025
- Print
- DarkLight
- Download PDF
Monitoring areas
- Updated on 03 Feb 2025
- Print
- DarkLight
- Download PDF
Article summary
Did you find this summary helpful?
Thank you for your feedback!
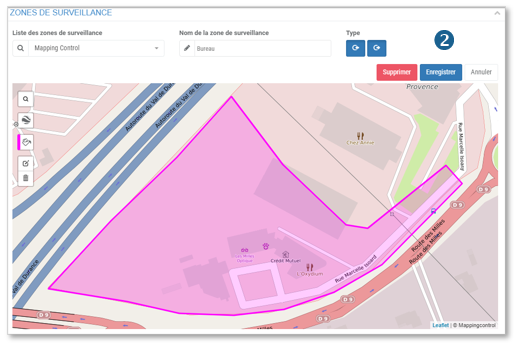
Show surveillance areas
If you have already created surveillance zones, they will be displayed on the map.
To view the details of a zone two ways:
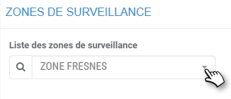
1. Select the area from the drop-down menu.
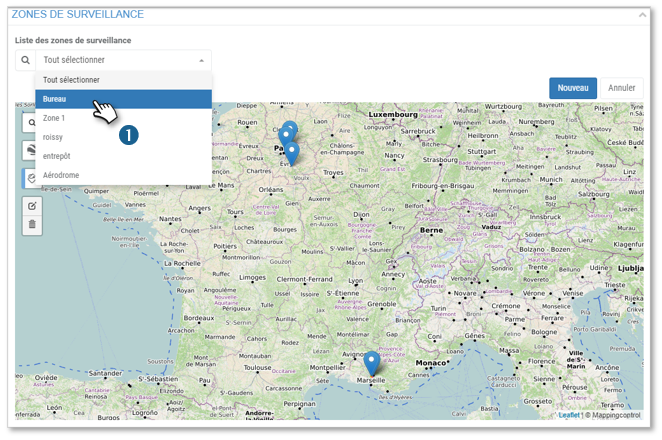
2. This is automatically displayed on the screen. You can change or delete it if you wish.
Otherwise from the general map: click on the pictogram  then select the type of area to display:
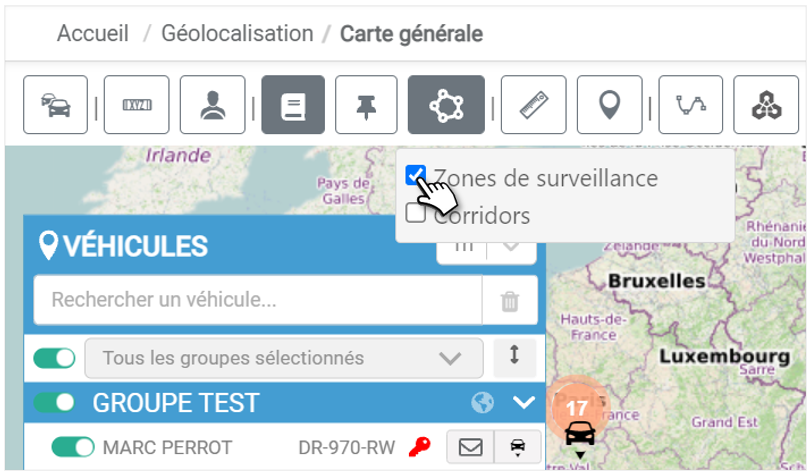
Geofencing: manually create the areas you want to monitor
Click on  to create a new area
1. Enter the name of the area.
2. By default the monitoring is in Zone Entry  and Zone Exit
 . Click on a type to deactivate it (the icon turns white).
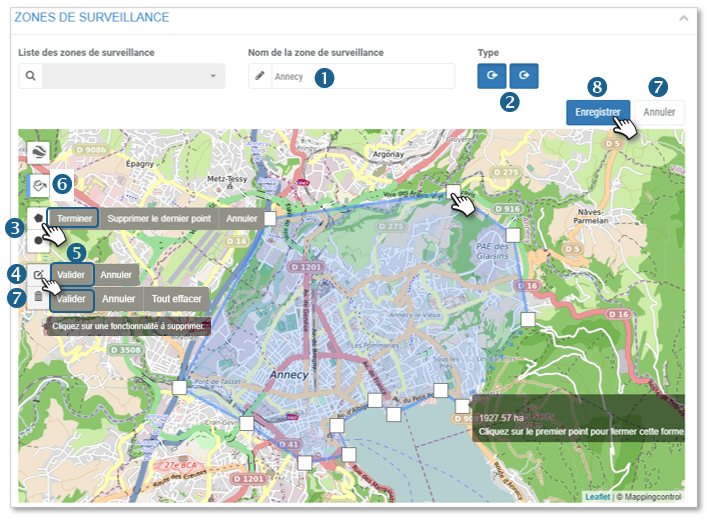
3. Click on the shape of the area you wish to draw:
 multi-point (unlimited): on the map, draw the outline of the area by clicking to drop a point. Finish by clicking on the starting point or by selecting "Finish" in the ribbon options.
 Circular: click on the map in the centre of the area you wish to draw, then, without releasing, move the cursor away from the centre and release the cursor. The area is drawn.
4. Click if you wish to change the field:
Multi-point: reposition the points where you wish on the map.
Circular: click on the centre or radius point to reposition it on the map.
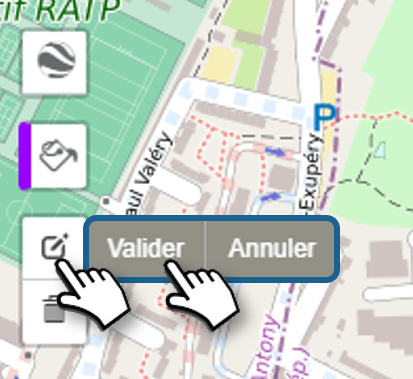
5. Click on VALIDATE in the options ribbon
6. Select a colour for the area.
7. If you wish to delete the area being created, click on the CANCEL button or click on then on the area on the map and click on OK in the options ribbon.
8. Don't forget to SAVE.
Corridoring: manually create the areas you want to monitor
It is also possible to create a corridor so that an alert is generated if a vehicle leaves a defined route
1. Start by selecting corridor from the drop-down menu.
2. Then choose between automatic or manual routeing.
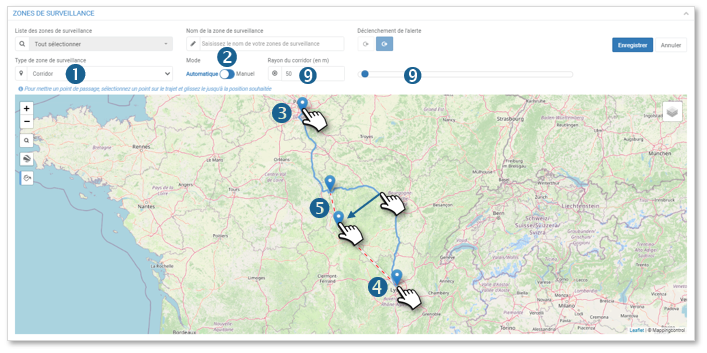
In automatic mode :
3. Click on the map to place the starting point.
4. Then click on the map to place the end point.
The route is created automatically.
5. If desired, place intermediate stages by clicking and dragging on the route.
In manual mode :
6. Click on the map to place the starting point.
Then click on all desired points of the route to draw the corridor.
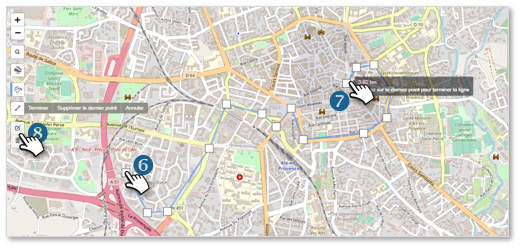
7. Double-click the last point to set it as the end point and complete the route.
8. These buttons allow you to change your route or delete it and start again.
9. Finish by setting the radius/width of the corridor. When the vehicle leaves this area, you will automatically receive an alert
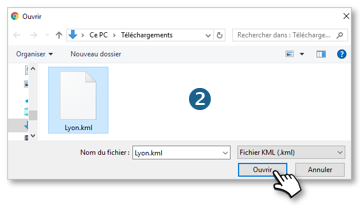
Import the .kml file of an area to be monitored
The application allows you to import zone files in .kml format from your workstation and SAVE them in the application.
1. Click to import the file from your computer.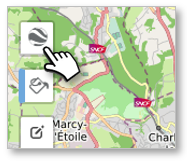
2. Select your file and click on OPEN
3. The area is displayed on the map.
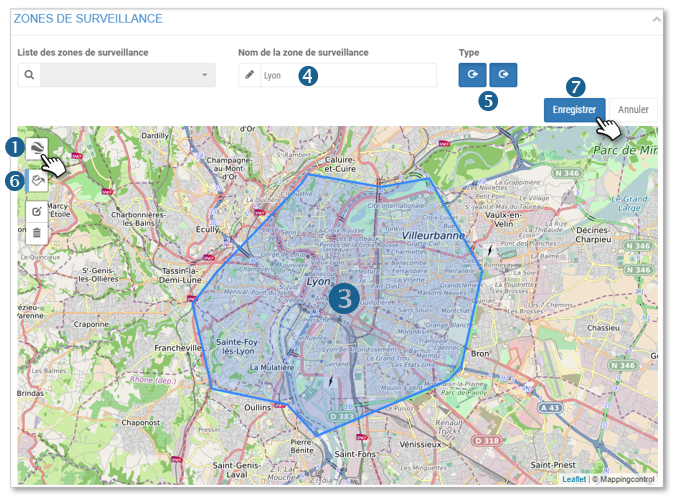
4. Enter the name of the area.
5. By default the monitoring is in Zone Entry and Zone Exit . Click on a type to deactivate it (the picto becomes white).
6. Select a colour for the area.
7. Don't forget to SAVE.
Edit or delete the areas you wish to monitor
Edit an area
1. Select an area from the drop-down list.
2. Click on the icon  to edit the area. Make your changes (colour, borders, type, name...)
3. Click on VALIDATE in the options ribbon
4. Don't forget to SAVE.
Delete an area
Permanently delete an area
1. Select an area from the drop-down list.
2. Click the DELETE button.
Delete an area and redraw it
1. Select an area from the drop-down list.
2. Click the icon to Delete the area.
3. Click on "Delete All" or on the area to be deleted
4. To redraw a new area: select a picto  or
or  refer to the explanations above to create an area.
5. Do not forget to SAVE.
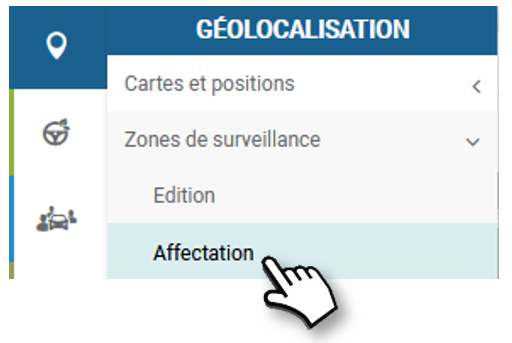
Assignment of geofencing zones
Association BY ZONE
Select a ZONE and associate vehicles with it. (Vehicles can be associated to several zones)
1. Select a zone from the list (the selected zone appears on the map).
2. Check the vehicles you want to associate with this zone.
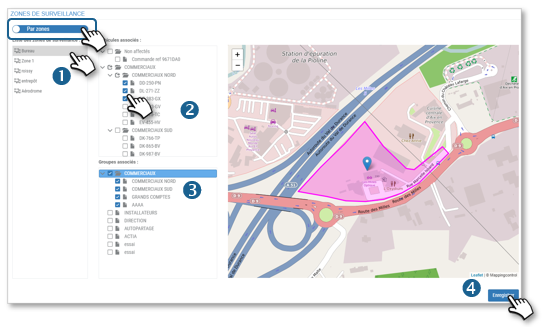
3. You can also check off Vehicle Groups.
4. Do not forget to SAVE.
Go to the next area in the list.
Association BY VEHICLE or GROUPS
Select one or more VEHICLE(S) or GROUP(S) and associate one or more zone(s) with it. (Vehicles can be associated to several zones)
1. Select one or more VEHICLE(S) from the list.
2. OR select one or more GROUP(S) of vehicles.
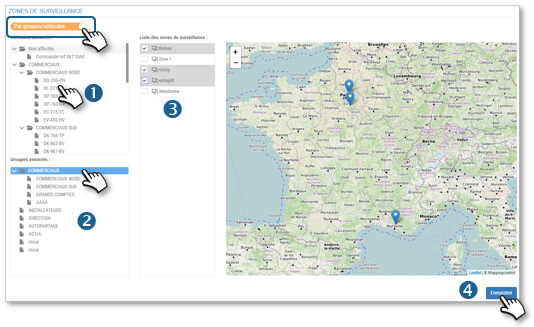
3. Check the areas you want to associate with your vehicle selection (the selected areas appear on the map).
4. Do not forget to SAVE.
Move on to another selection of vehicles.
Assignment of corridoring areas
The assignment of a corridor is done from the general map.
1. Click on the vehicle to which you wish to assign a corridor
2. At the bottom right of the screen, select the corridor to be assigned from the drop-down list
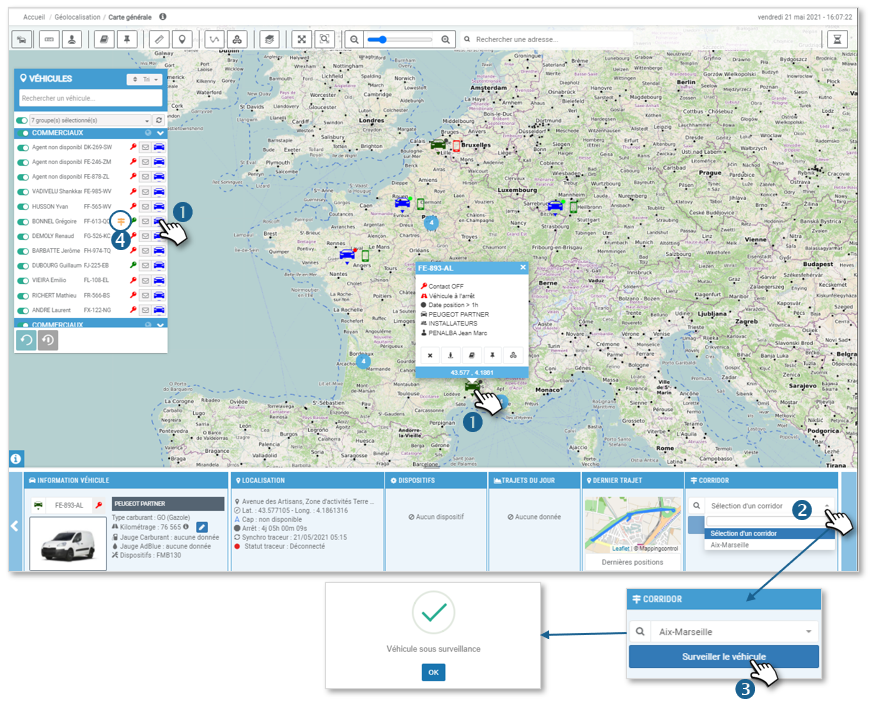
3. Then click on MONITOR VEHICLE. A window appears confirming that the vehicle is being monitored.
4. The pictogram  appears in the module next to the vehicle being monitored
5. To stop the monitoring, click on the corresponding red button.
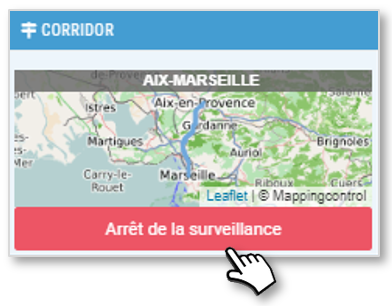
Monitoring is activated when the vehicle enters the corridor. It is deactivated when it reaches the arrival point.
Zone entry and exit alerts
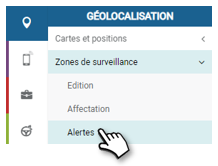
1. To enable and disable zone entry and exit alerts, click on  and
and . You will then receive a notification of entry into the zone if it is enabled, and the same for exit.
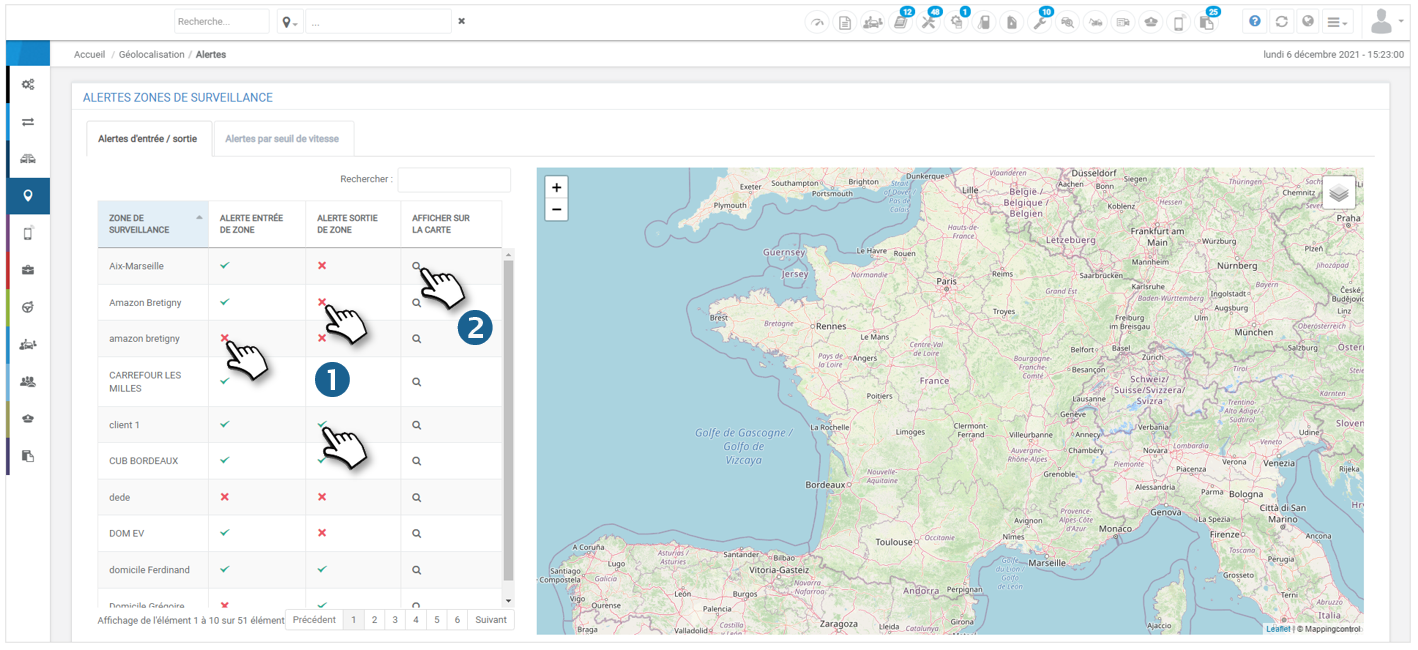
2. You can also view the monitoring area in question on the map on the right by clicking on the pictogram
Speed threshold alert
This alert is only accessible after you have activated the possibility of using the instantaneous or maximum speed in SETTINGS > GEOLOCATION > GENERAL :
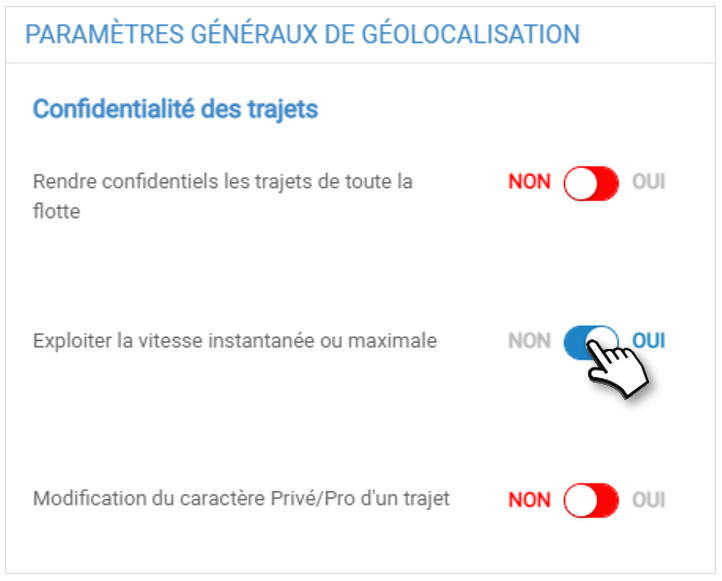
You can set up speed ranges for which you will receive an alert when one of the vehicles enters that speed range
Configurer les alertes
1. Go to the tab " Speed threshold alerts ".
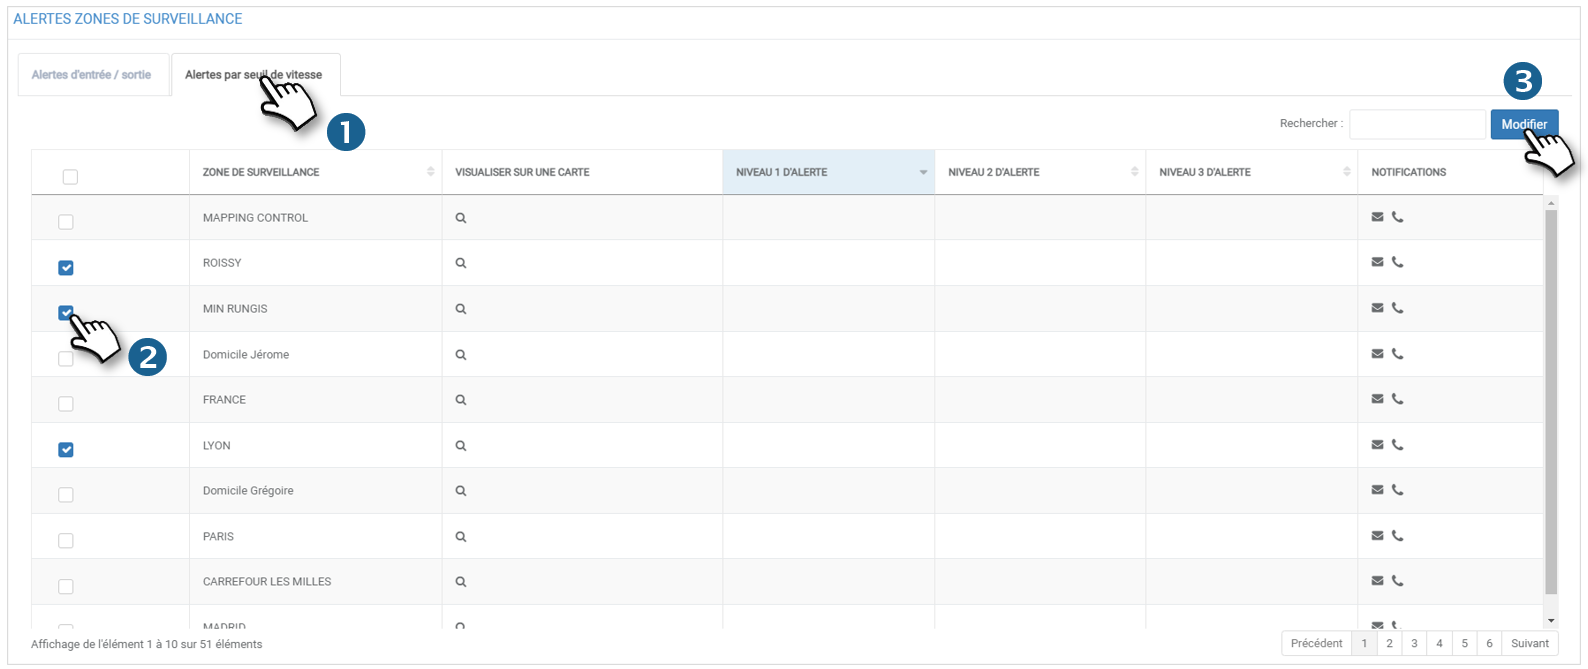
2. Select the monitoring area(s) for which you want to set up or modify an alert
3. Click on modify. The following window opens:
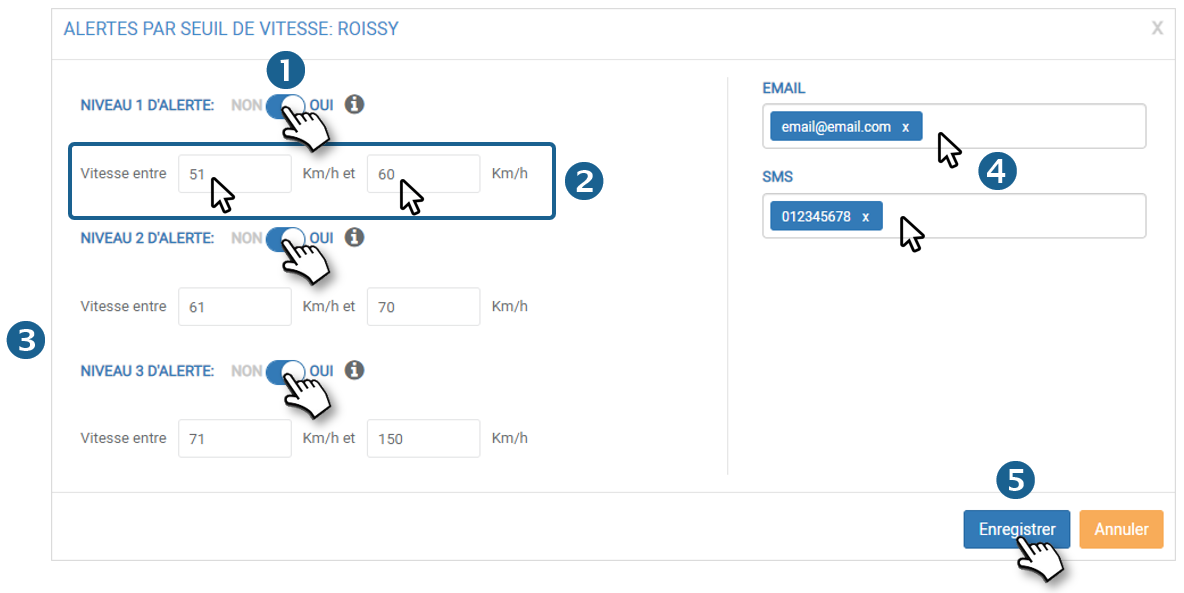
1. Activate the level 1 alert by clicking on the slider
2. Define the speed range in which you want to receive an alert
3. Do the same if you want to define level 2 and 3 alerts (you can come back later to configure or deactivate them). ATTENTION: the level 2 alert can only be activated if the level 1 alert has been activated, and the level 3 alert can only be activated after the level 2 alert.
4. Insert one or more email addresses and/or phone numbers.
Important information
The level 1 alert only generates an alert in the upper banner.
Level 2 and 3 alerts generate an alert by email and notification if the email address has been previously registered.
5. Click on SAVE.
The speed ranges are now displayed in the columns :

Viewing alerts
When a vehicle enters one of the defined speed ranges, the manager sees a notification appear in his upper banner. By clicking on the pictogram it is possible to visualize at a glance the alerts:
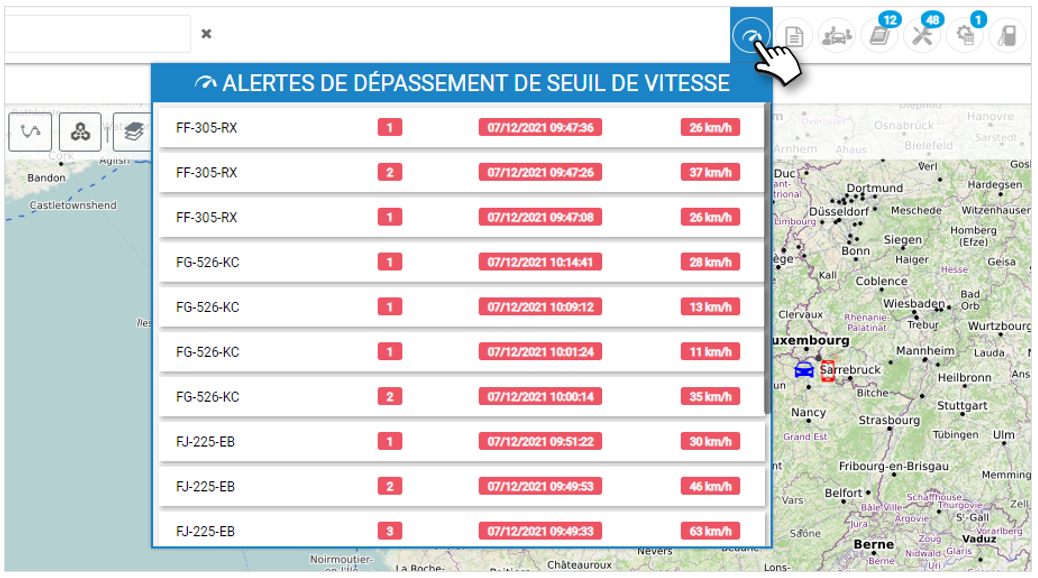
You can thus visualize the vehicle in question followed by the alert level, the date and time of its generation and the speed recorded.
Attention
Alerts can only be generated if vehicles have been assigned to the zone in question. See monitoring zone assignment.
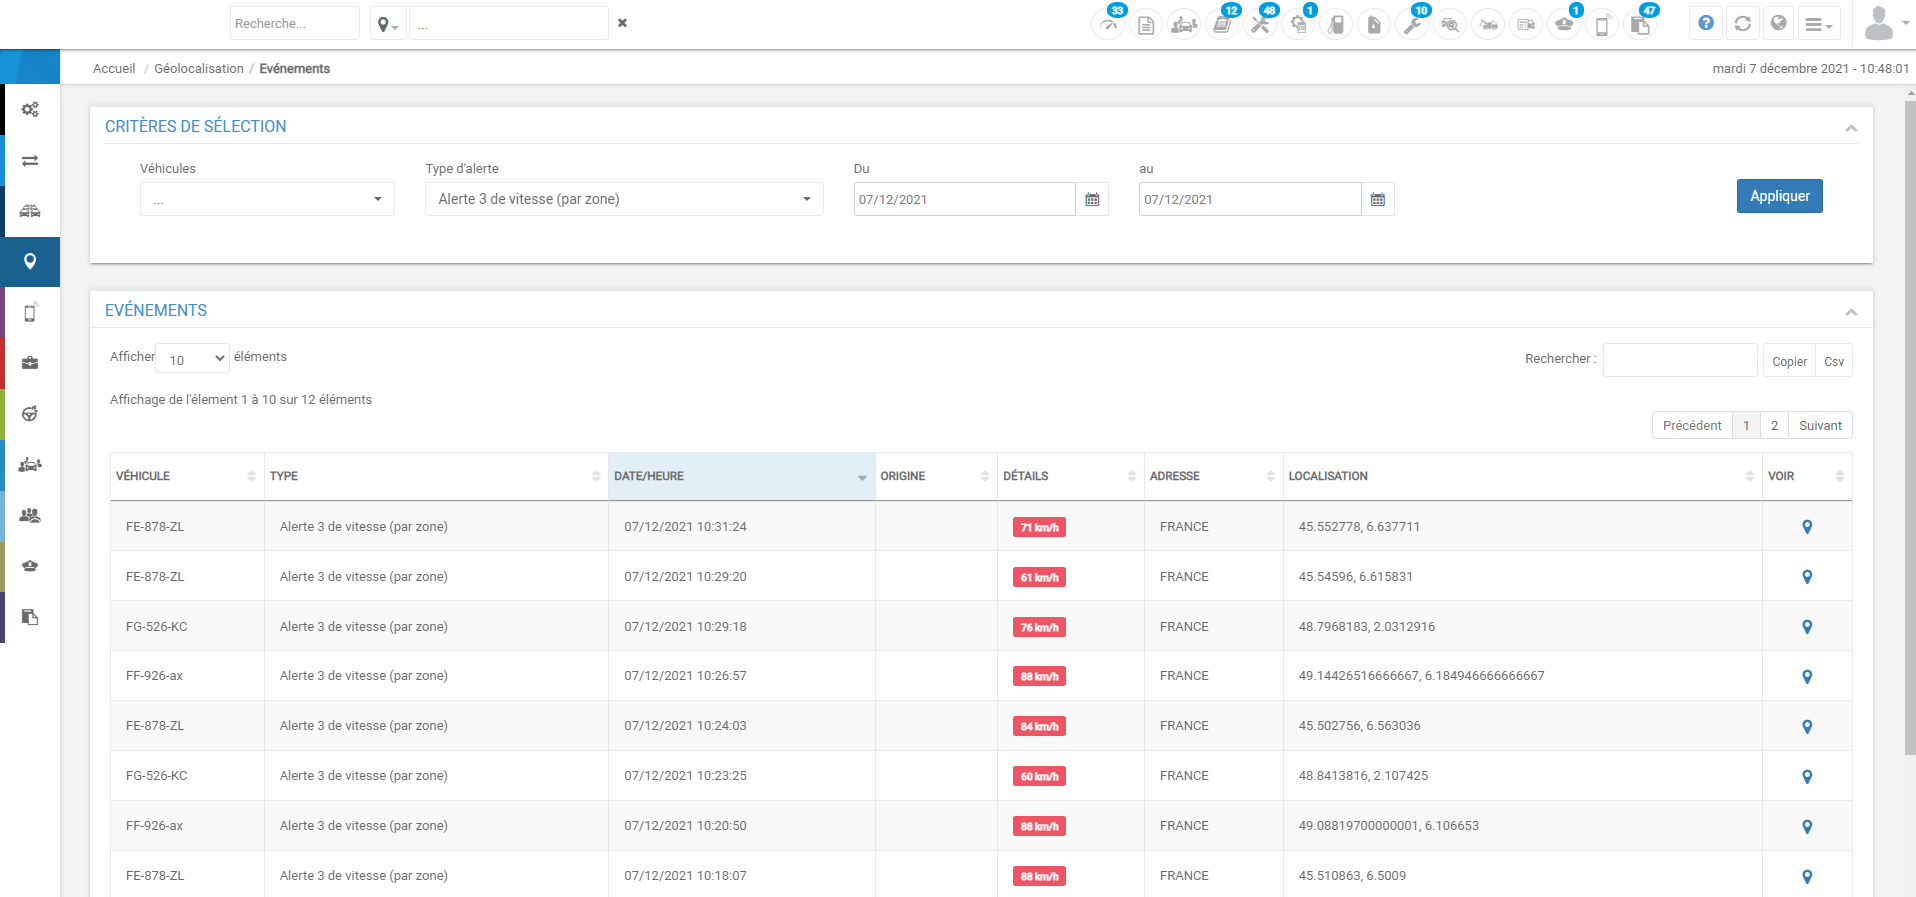
When you click on one of the alerts, you are then redirected to the geolocation events page where the latest speed violation alerts are displayed:
Alert for "presence since..."
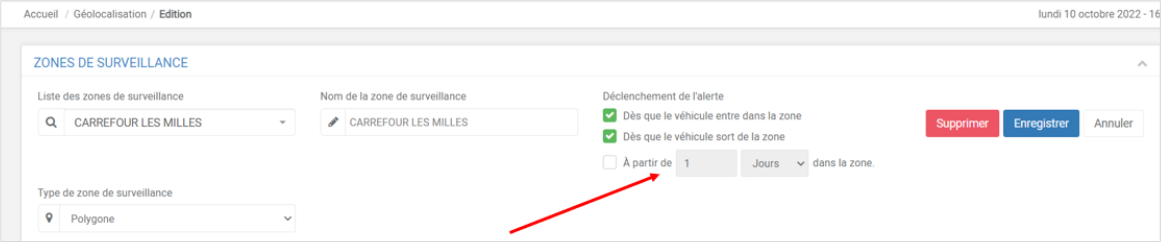
This alert in the surveillance zone, allows you to receive notifications when a vehicle assigned to the surveillance zone is present in the zone for x time.
To activate it, check the box by filling in a duration, in hours or days (24 hours max or 5 days max).
Once the alert has been configured and recorded, you will be notified, by email (the one configured in the alerts module for the vehicle, in the "Vehicle activity", "Equipment" and "Consumption" tabs), in the same way as for zone entries and exits. As soon as a vehicle assigned to the surveillance zone concerned has remained in the zone x time.
Was this article helpful?