Vehicle Assignment
- 19 Sep 2024
- Print
- DarkLight
- Download PDF
Vehicle Assignment
- Updated on 19 Sep 2024
- Print
- DarkLight
- Download PDF
Article summary
Did you find this summary helpful?
Thank you for your feedback!
Assigning a vehicle to a driver
Why assign a vehicle to a driver?
Assigning a vehicle to a driver makes the operational and financial management of your fleet and the running of your business easier and more rigorous.
It also makes the application easier to use and more accurate:
- Systematic association of the driver with the vehicle on the application's screens
- Display of the driver's name in the application's drop-down lists and in reports...
- Driver identification for road traffic offences
- Allocation of vehicle-related costs
- Integrated application communication with vehicle drivers
This is highly recommended when a vehicle is essentially driven by the same driver, particularly in the following cases:
- Company vehicle allocated to one person
- Service vehicle assigned to one person
Please note!
On the driver record, if you replace the name of the previous driver with a new one, all the history will be attributed to the new driver.
To keep the previous driver's history, use the assignments.
These assignments are also necessary if the box is transferred from one vehicle to another. If you replace the registration in the vehicle master record with a new registration, all the history of the old vehicle will be assigned to the new one.
There are 2 ways of doing this:
- Simplified assignment
- Assignment via the assignment page
1. Simplified assignment
First of all, it is important to note that simplified assignment is only available on the vehicle master record.
Open the vehicle master record.
Click on ‘Unassigned vehicle’ and a pop-up window will appear, offering you the option of assigning it to a driver.
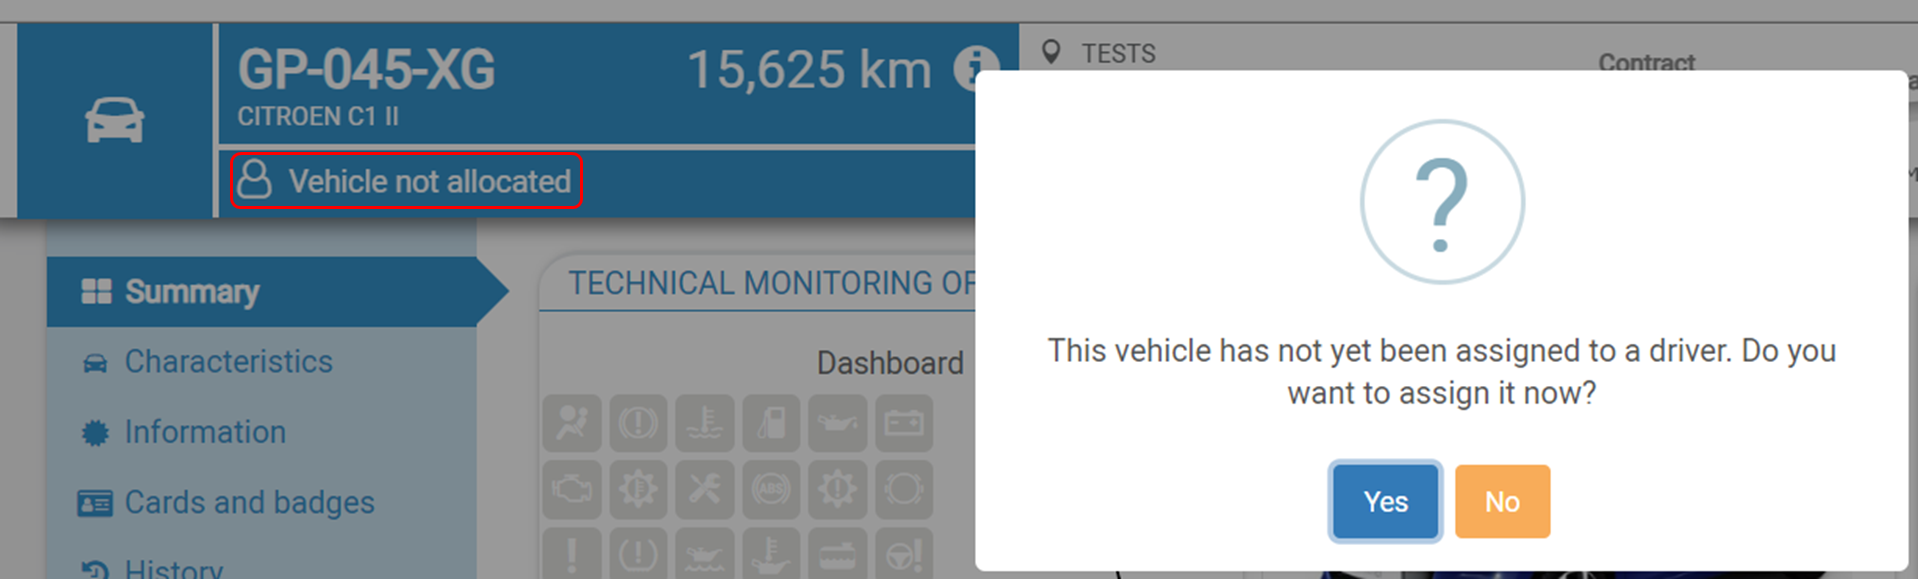
If you click on NO = the message closes, it will not reopen, and the icon becomes clickable, allowing you to assign it at a later date.
If you click YES = a new pop-up window opens, offering you the choice of a driver from a list (if already created), or the creation of a new driver.
 There are two quick steps:
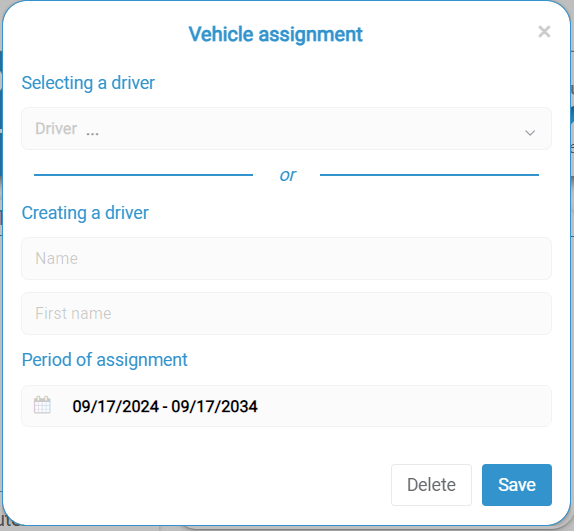
1) Assign a vehicle to a driver
- Select a driver
This is used to select a driver already in the database using the drop-down list.
OR
- Create a driver
Enables you to create a driver by entering their first and last names, and add them to the database.
2) Set the assignment period
This section allows you to define the period during which the vehicle will be allocated to the driver, with a start and end date.
In the example below, the period selected is from 09/17/2024 to 09/17/2034. The default term is 10 years.
Drop-down list of duration options: click on the date field and select the desired period from the drop-down list or customise the period.
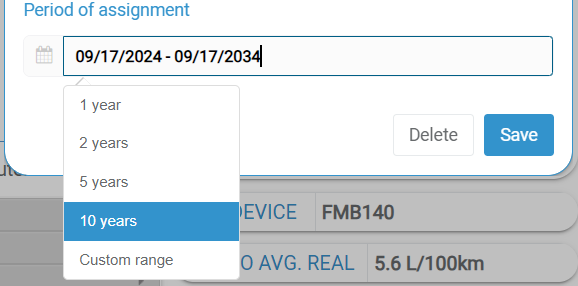
Customised period: if none of the predefined durations are suitable, you can choose this option to enter the start and end dates manually (see image 1).
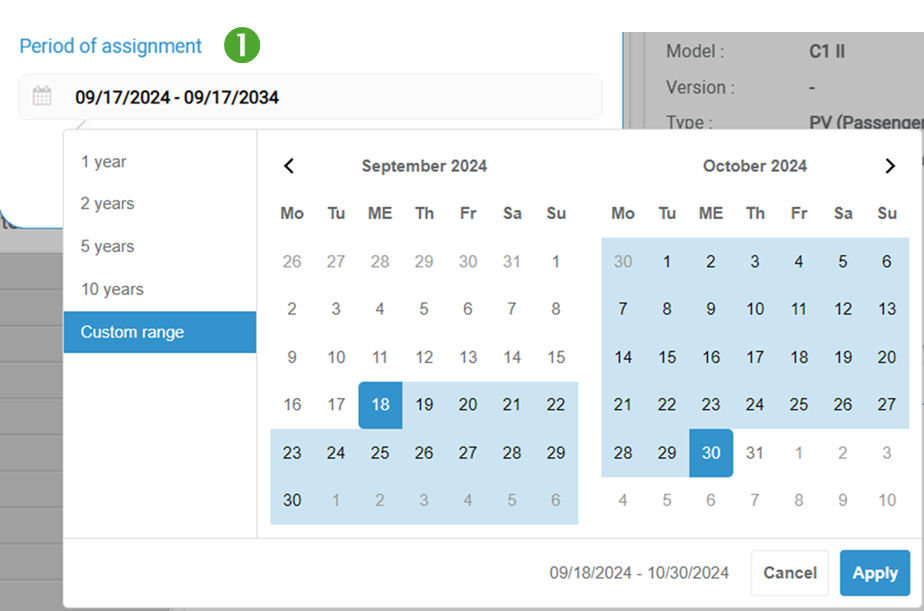 Click APPLY to confirm the sectioned period.
Don't forget to SAVE to validate the driver's assignment to the vehicle for the period indicated.
2. Assignment via the assignment page
a - Assignment from the table
1. To access the assignments, go to the SETTINGS > Staff > Vehicle assignment menu.
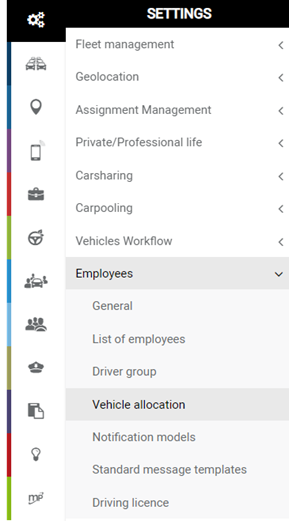
2. The assignment table is automatically displayed, showing all the vehicles in your fleet and the status of their assignments. Only assigned vehicles appear on the table.
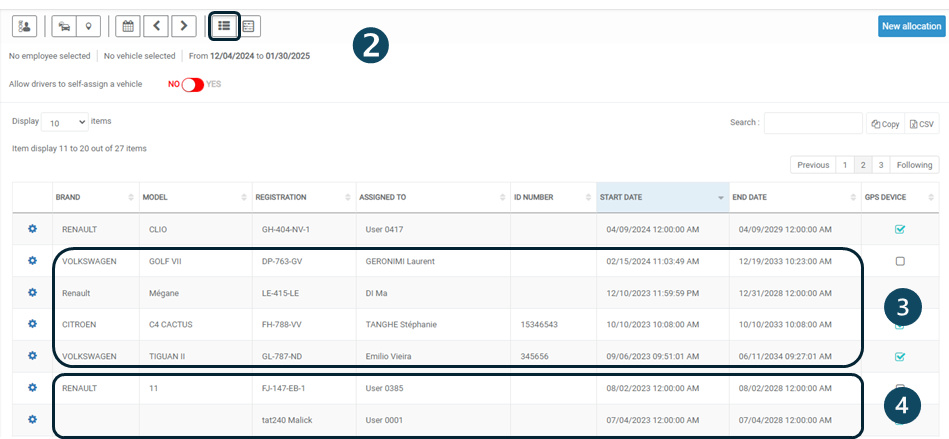 3. An assignment is correct when the vehicle characteristics are complete (make, model, registration number) and the first and last names of the driver are present.
4. If the driver's first name and surname do not appear: the vehicle is virtually assigned but without a designated driver.
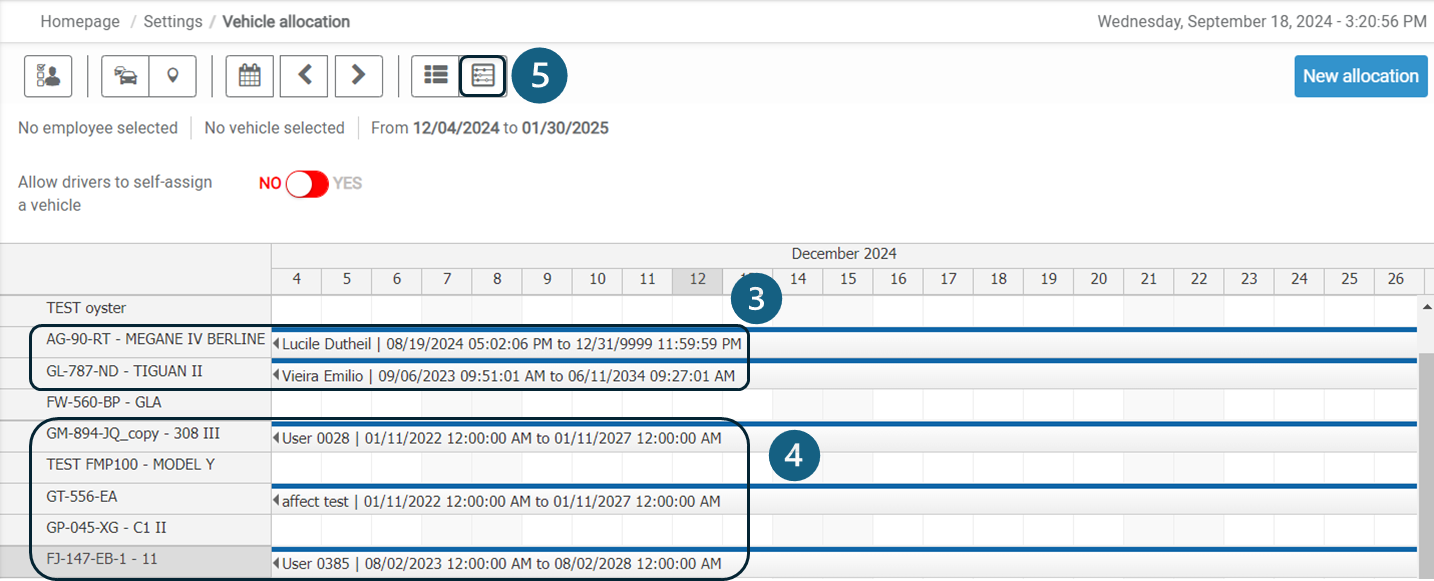
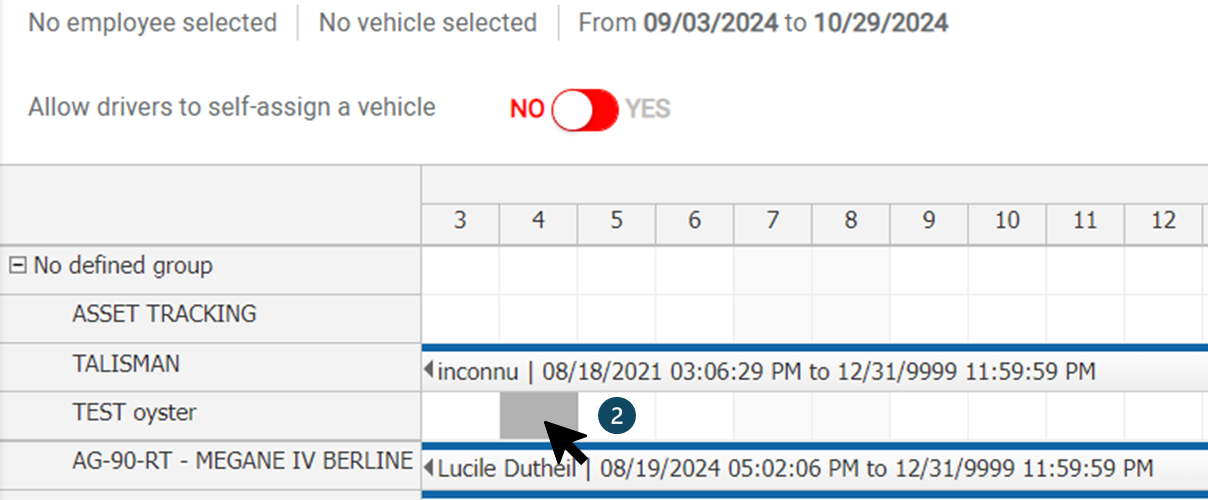
b - Assignment from the calendar
5. Click here to view the assignments in calendar format.
3 events create an assignment:
1. A manual assignment by the Manager or Administrator
2. A car-sharing vehicle pick-up
3. Identification by badge or dallas key
Using the calendar, you have 2 ways of accessing the assignment creation window:
1. New assignment' button
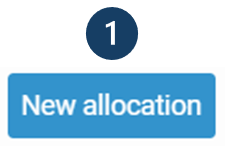
2. Click on the line of the vehicle concerned
The assignment window opens, in which you select :
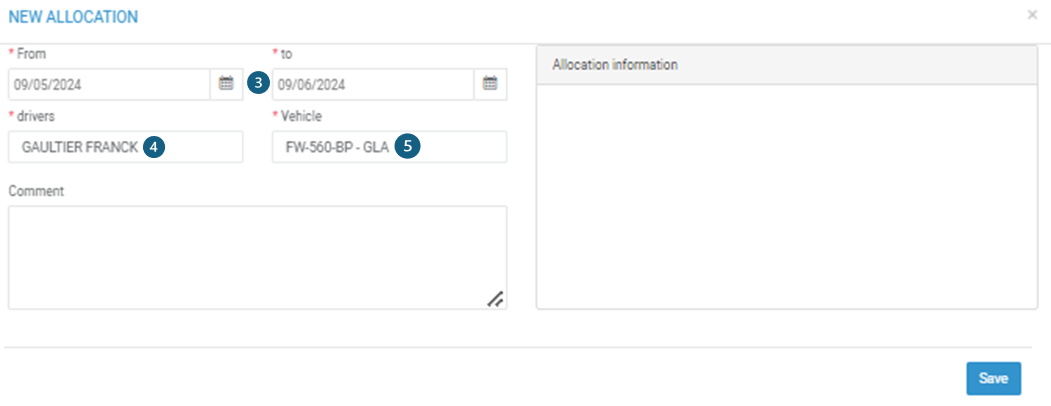 3. The assignment period
4. You can choose the driver(s)
5. You can choose the vehicle. This will be automatically selected if you have clicked on the relevant line.
6. Don't forget to press SAVE.
7. If the driver is already assigned to another vehicle, an error message will be displayed. You will need to delete the assignment for this driver before making him available in the list.

8. The new assignment will then appear in the list and calendar.

Deleting or modifying an existing assignment
Deleting an assignment
There are 2 ways of deleting an assignment:
1. Select DELETE in the pictogram option:
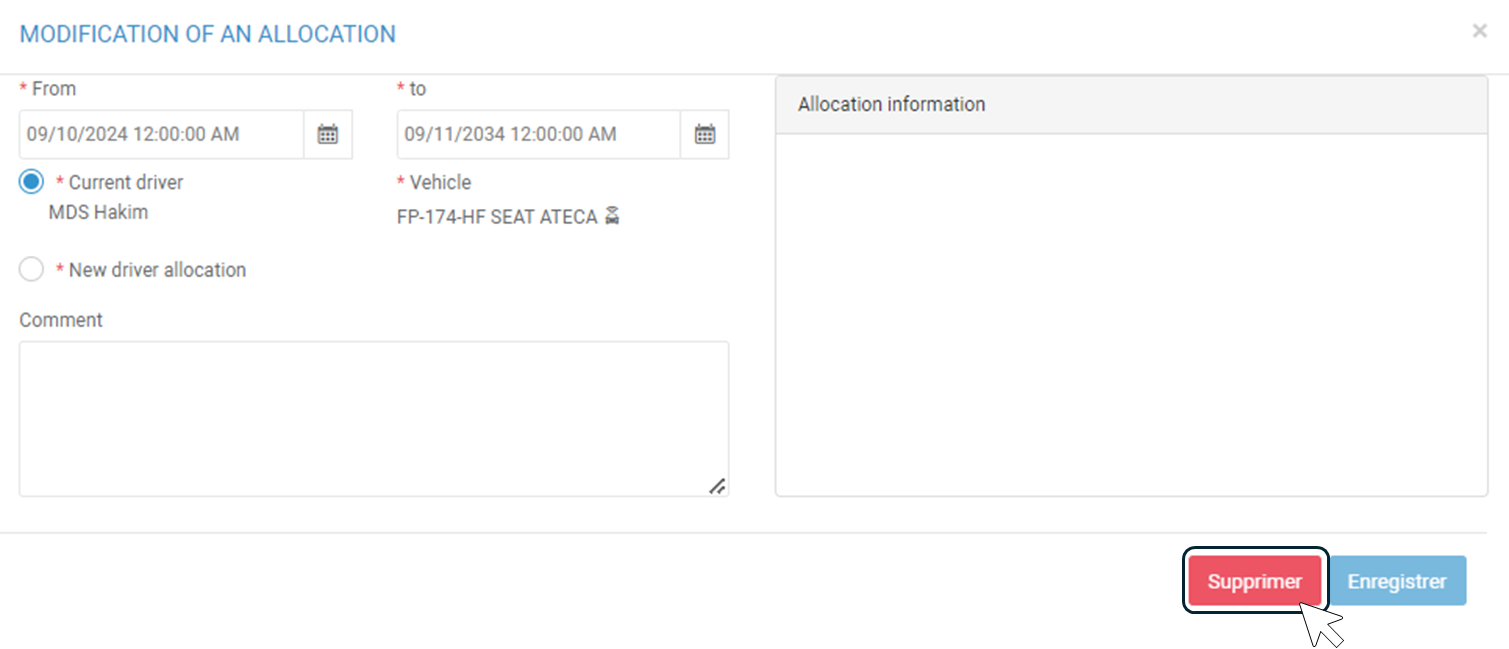
 2. Click on the line of the vehicle concerned and click on DELETE in the window which has just opened:
The assignment no longer appears in the table or list.
Modifying the dates of an assignment only
Open the edit window and press EDIT.
Modify the date(s). If there is an overlap for this driver, an error message will appear. You will not be able to save the modification until the dates are correct.
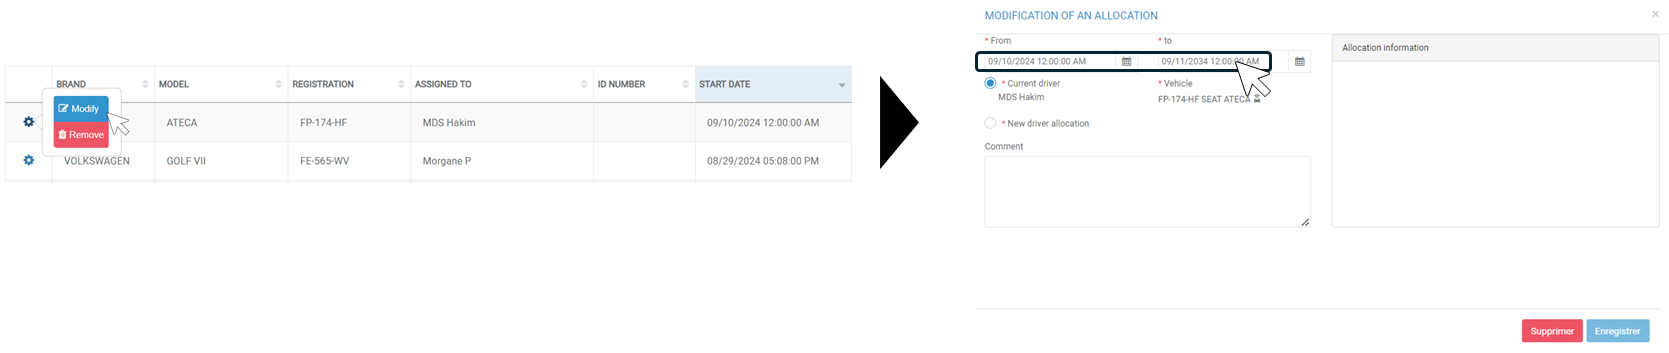 Click on SAVE. The modified assignment appears in the table and the list.
Modifying the driver of an assignment
Open the modification window by clicking on the pictogram  and then MODIFY or by clicking on the line.
1. Click on ‘New driver assignment’ and select the new driver. If there is an overlap for this driver, an error message will appear. You will not be able to save the modification until the availability of a driver or the vehicle is correct.
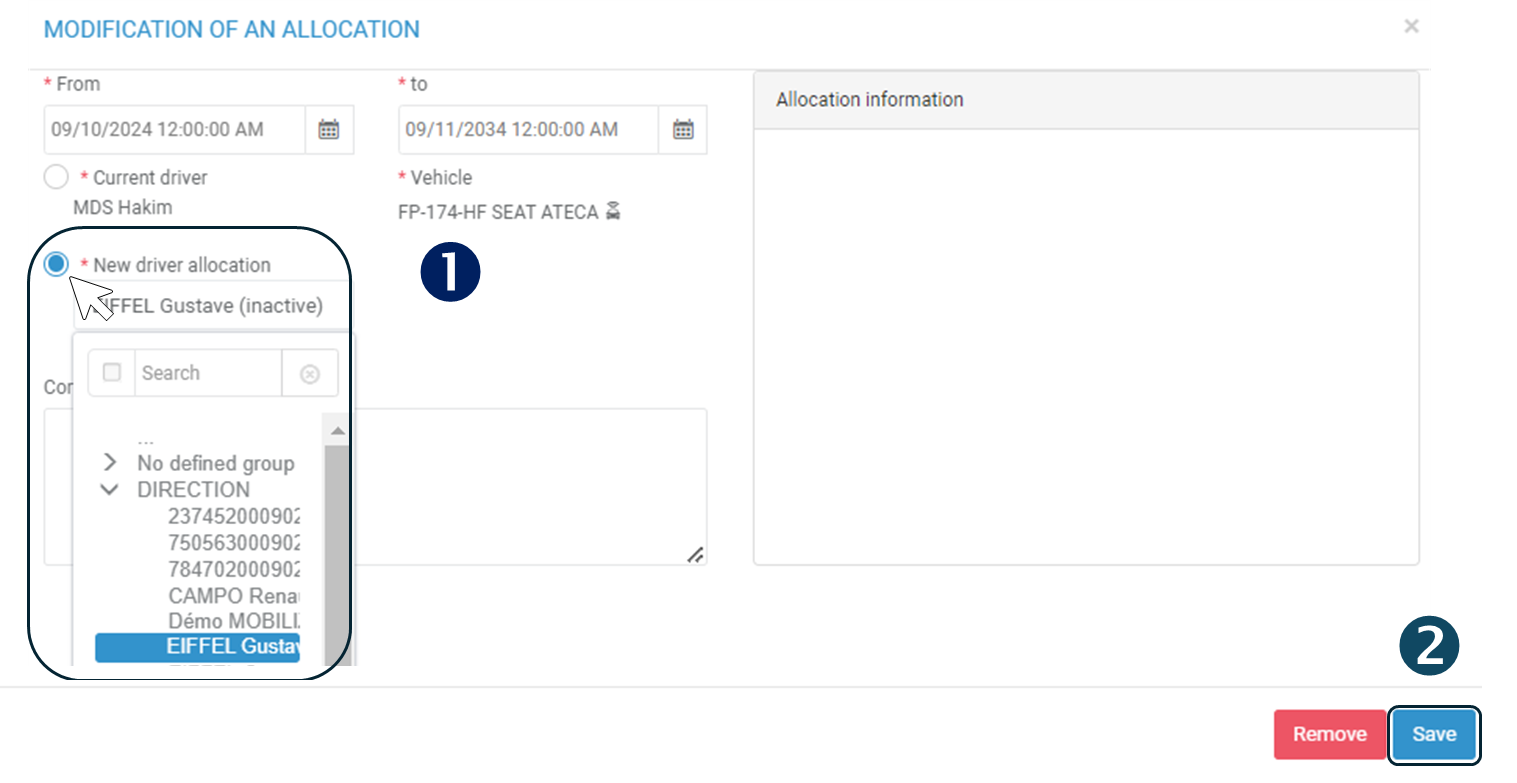
2. SAVE
The 2 assignments will appear in the table and the list:
- the previous modified assignment, which will end on the date on which the new assignment begins.
- The new one with the new driver.
Assignment by identification key/badge
Before using identification keys, the serial numbers of the keys must be recorded in the employee files:
- Open the driver's file
- Click on the ‘Cards and badges’ tab
- Enter the identification number engraved on the key: 12 characters
- Register
- Proceed in the same way for all employees

Self-assignment by a driver
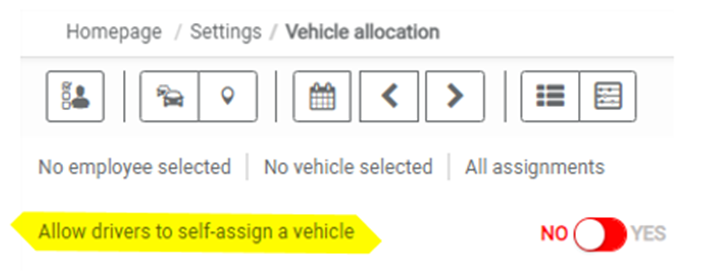
This feature allows drivers to temporarily self-assign a vehicle
This represents an alternative to the physical identification of drivers (dallas key or RFID badge).
This self-assignment is carried out on the Optimum Connect mobile application for the driver.
If the cursor is set to YES, drivers can carry out this self-assignment on the mobile application.
By default, the cursor is set to NO.
The use of this functionality is described here.
Was this article helpful?